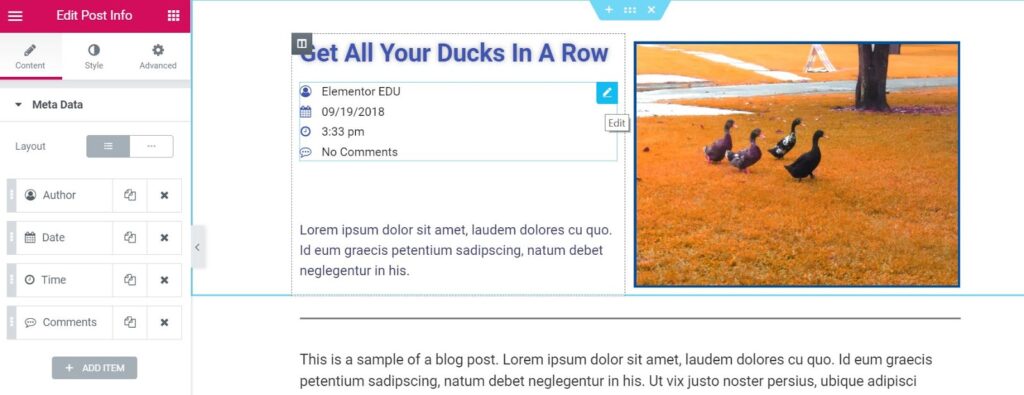
The Post Info widget is a Theme Element. It is one of the available Single Post Template widgets that is used to dynamically display the current post’s meta data, such as author, date, time, and comments.

Content
Meta Data
Layout: Choose to display the post info items vertically or horizontally.
The next options are displayed as a list of all the available meta data. You can drag and drop them to change their order. Click on the Add Item button to add a custom post info meta item to the list.
Tip: Quickly duplicate or delete items by clicking an item’s Duplicate or Delete  icon.
icon.
By clicking on each item you can customize its content and settings, which are:
Author
- Type: Change the type of item from Author to Date, Time, Comments, Terms, or Custom
- Before: Enter text to be displayed before the Author
- Avatar: Set to YES to display the Author’s avatar next to the Author’s name
- Link: Set to YES to link to the Author’s archive
- Icon: Select None or select Default to display the default icon, or choose Custom to select a Font Awesome icon
Date
- Type: Change the type of item from Date to Author, Time, Comments, Terms, or Custom
- Date Format: Select from several date formats, or choose Custom to format your own
- Before: Enter text to be displayed before the Date by entering a value or using a Dynamic Tag
- Link: Set to YES to link to that Date’s archive
- Icon: Select None or select Default to display the default icon, or choose Custom to select a Font Awesome icon
Time
- Type: Change the type of item from Time to Author, Date, Comments, Terms, or Custom
- Time Format: Select from several time formats, or choose Custom to format your own
- Before: Enter text to be displayed before the Time
- Icon: Select None or select Default to display the default icon, or choose Custom to select a Font Awesome icon
Comments
- Type: Change the type of item from Comments to Author, Date, Time, Terms, or Custom
- Before: Enter text to be displayed before the Comments
- Custom Format: Set to YES to change the phrasing for No Comments, One Comment, etc.
- Link: Set to YES to link to the comment form for the current post
- Icon: Select None or select Default to display the default icon, or choose Custom to select a Font Awesome icon
Style
List
- Space Between: Adjust the space between each post info item
- Alignment: Align the list of post info items left, center, or right
- Divider: Set ON to add a divider line between each post info item.
If Divider is set to ON, the following options become available:
Divider
- Style: Select solid, double, dotted or dashed
- Weight: Set the divider’s weight
- Height: Set the divider’s height
- Color: Choose the divider’s color
Icon
- Color: Choose the color of the post info icon
- Size: Set the size of the post info icon
Text
- Text Indent: Set the amount of space the text is indented from the icon
- Text Color: Choose the color of the text
- Typography: Set the typography options for the text
Read the tutorial showing how to Create a Single Post Template