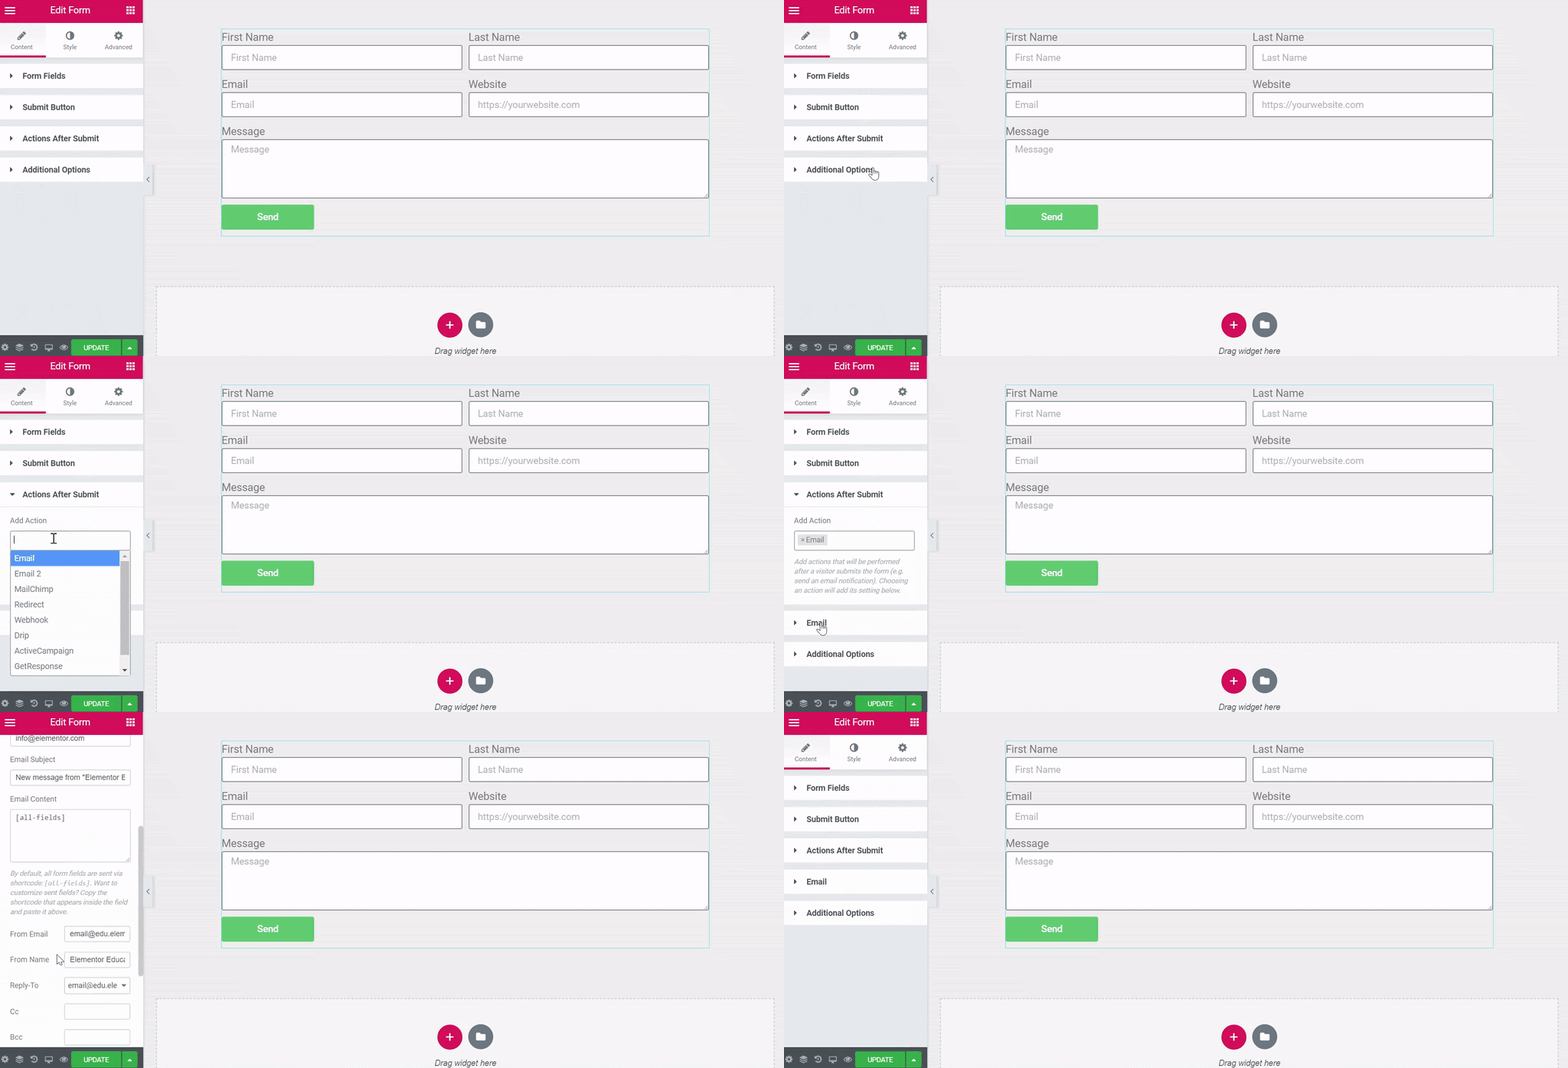
Add actions that will be performed after a visitor submits the form (e.g. Open or close a Popup, Send an email notification, Connect to a third-party such as MailChimp, Redirect, etc.)
To learn more about the integration of services please visit this link.
To learn more about the form API visit the Elementor Developers section on our site here.
After A User Submits A Form, Then What?
A common question from first-time form designers is, “ I’ve set up my Elementor form, but nothing happens when it gets submitted. Why?”
The answer is usually, “ You haven’t yet set up the “After Submit” Actions.”
Once an Elementor form is submitted, you’ll want one or more actions to take place, and each of those actions requires a small amount of setup. Some common actions include:
- Email the form results to one or more email addresses.
- Redirect the user to a “Thank You” page.
- Add subscriber information to a newsletter autoresponder service
- Add user information to a CRM
- Send form data to a Slack or Discord Channel
- Open or close a Popup.
Elementor form actions give you powerful options. You can connect with 3rd-party services such as Mailchimp, Drip, Hubspot, Slack, or Convertkit to process the form information. Elementor has these and several more service integrations built-in, but you aren’t limited to connecting with just the built-in integrations. Your forms can also connect with services such as Zapier, via the Webhook action. Zapier connects to 1000+ other services and acts as a bridge between your form and those services. Read our extensive guide on using Elementor with Zapier here.
The list of available Elementor Form Actions currently includes: Email, Email2, Mailchimp, Redirect, Webhook, Drip, ActiveCampaign, GetResponse, and Convertkit, MailerLite, Slack, Discord, and Popup. To learn more about the integration of services, please visit this link.
Content
Actions After Submit
Add new actions by clicking inside the Add Action field. This will bring up a list of available actions to choose from.

Send Results Via Email
Choose Email action. This will add an Email tab.
Click Email tab to open its options.
- To: The email address(es) the form submission results will be sent to. Add additional email addresses separated by commas.
- Email Subject: The subject of the email
- Email Content: The body of the email. By default, all form fields are sent via the shortcode: [all-fields]. Want to customize which fields are sent? Copy the shortcode that appears inside the fields you want to send and paste them here.
- From Email: The “sent from” email address
- From Name: The “sent from” name
- Reply-To: The email address to send replies to
- CC: Email addresses to CC
- BCC: Email address to BCC
- Meta Data: Available meta data is included by default. Click the “x” on each to delete any that you don’t wish to include in the email.
- Send As: Select the format in which to send the email, either HTML or Plain
Important! Only shortcodes located in the advanced tab of the form fields widget can be used. You cannot use shortcodes from anywhere else here. Adding other shortcodes from other plugins or elsewhere will cause a server error message. The shortcode needs to be written exactly as it appears in the form field’s advanced tab, with one exception. If the shortcode in the advanced tab is of the format [field id=email], you must wrap the field name in straight quotes, so you would need to change [field id=email] to [field id="email"].
Send Email Confirmation To The User Who Submitted The Form
Configure Email2
Email2 is very useful. For example, it could be a confirmation email received by your site’s visitor – immediately after he sent a form on your site.
To create one, go through the same process as above for Email.
Note: In the ‘To’ field you should input the shortcode located in the advanced tab of the email field [field id="email"].
Tip: You can personalize the confirmation email by using the submitter’s first name (‘Howdy [field id="name"]’).
Here there is an example how to build the entire email content using HTML:
<p>
     <p>You got a new message!</p>
</p>
<p>
     <p>Username: [field id="name"]<br />
</p>
<p>
     <p>Email:  [field id="email"]<br />
</p>
<p>
     <p>Phone:  [field id="tel"]<br />
</p>
<p>
     <p>Message: [field id="message"]</p>
</p>
<p>
     <p>Don’t forget to call them back soon :) </p>
</p>
Important! Only shortcodes located in the advanced tab of the form fields widget can be used. You cannot use shortcodes from anywhere else here. Adding other shortcodes from other plugins or elsewhere will cause a server error message. The shortcode needs to be written exactly as it appears in the form field’s advanced tab, with one exception. If the shortcode in the advanced tab is of the format [field id=email], you must wrap the field name in quotes, so you would need to change [field id=email] to [field id="email"].
Redirect To A Thank You Page
Choose Redirect action. This will add a Redirect tab.
Click Redirect tab to open its options.
- Redirect To: Enter the URL of the page to redirect the user after form submission.
Add Subscriber To A Newsletter Email Marketing Service or User Information to a CRM
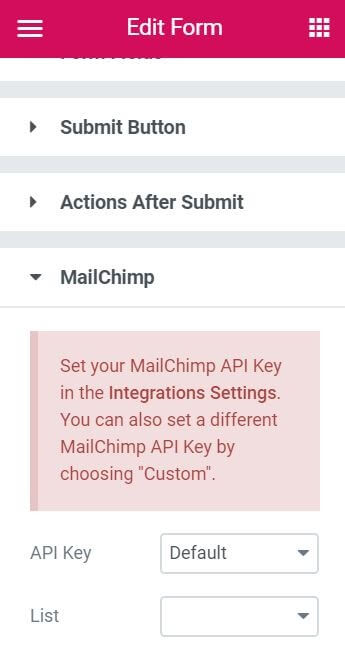
Choose any of the 3rd Party services. This will add a new tab for that service.
Click the tab for the chosen service to open its options.
- API Key: Enter your API key for the chosen service here. You must first set up your API credentials in the Integrations Settings. You can also set different API credentials by choosing “Custom”.
- List / Account: Select the list or account to send the form information to.

Use Zapier To Connect Your Form To Any Of Thousands Of Other Services
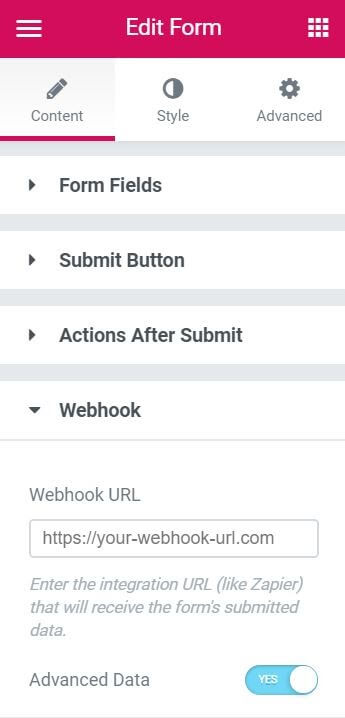
Choose Webhook action.
Click Webhook tab to open its options.
- Webhook URL:Enter the integration URL (like Zapier) that will receive the form’s submitted data.
- Advanced Data: Slide to YES to send Advanced Data to the webhook, which will include meta data such as Date and Time, Remote IP, etc. It will also send the data as an array, such as:[ ‘Name’ => ‘John Doe’, ‘Email’ => ‘[email protected]’, ‘Message’ => ‘Please contact me’ ]If Advanced Data is set to NO, the data will be sent in Simple form, which will send the form fields to the webhook as a text message, such as:“Name: John Doe, Email: [email protected], Message: Please contact me.”

Send Form Data To A Slack Channel
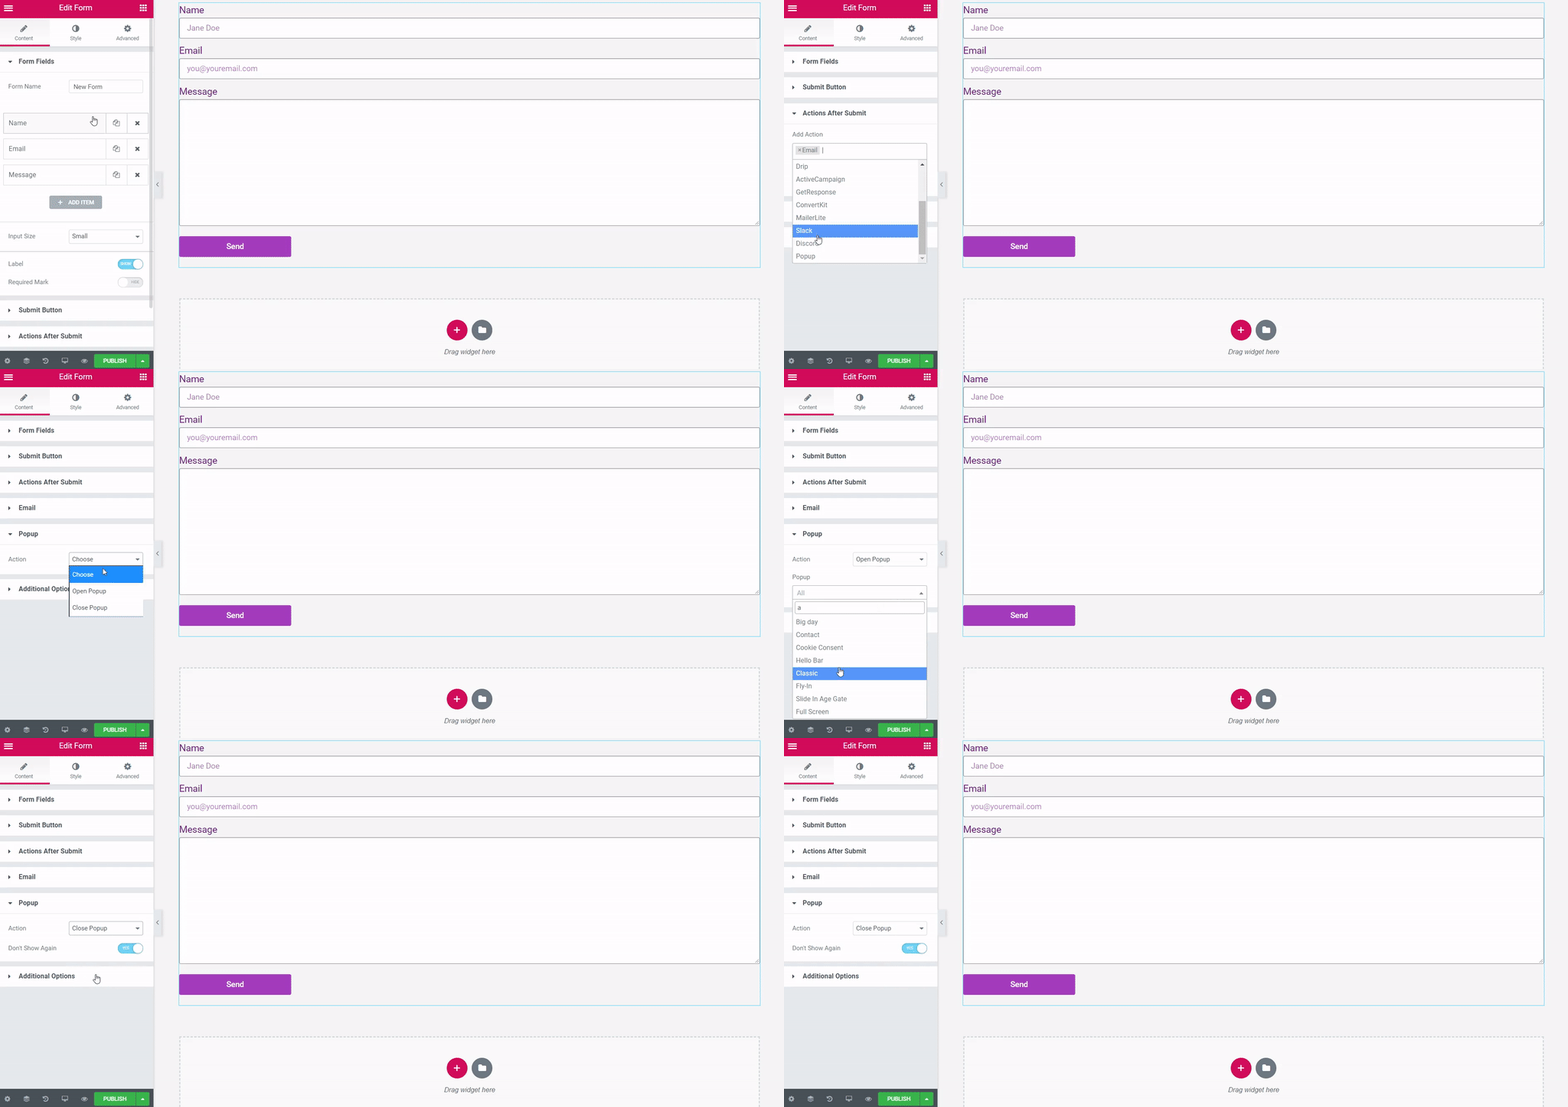
Choose Slack Action. This will add a new Slack tab.
Click Slack to open its options.
See the Slack integration documentation for more details.
Open or Close A Popup
Popups can be opened or closed after submission of a form.
Choose Popup Action. This will add a Popup tab.
Click Popup to open its options
- Select Open Popup to choose a popup that will open after submission of the form. Enter one or more characters to generate a dropdown selection of available popups to choose from.
- Select Close Popup to close the current popup after form submission. You can also set the popup to Don’t Show Again.

Learn more about the Form Widget (Pro)