Introduction
When using the Text Path Widget, you have the option to select a custom SVG path. In this document you will learn how to create the custom path and upload it to your project. SVG paths can be created in one of the following ways covered below:
- Create a path with design software such as Adobe Illustrator.
- Create a path with an online SVG path generator.
Guidelines for creating paths
When creating paths, you need to remember three ground rules:
- The path you are creating needs to be a Path (not line, polyline, or circle…)
- Every path needs a starting point
- The path should be created from LTR (Clockwise)
Note: When creating a path from RTL, the text will be upside down.
Creating an SVG path with Adobe Illustrator
The process for creating an SVG path with Adobe Illustrator can be found below.
Create a New Artboard
Create a new Artboard in Ai from the File menu (For example, Artboard size – 250X250 px)
Create an Open Path
Create any path shape you would like by using the Pen tool (For example, the wave shape shown below)
- Make sure the Stroke color is solid black (#000) and the Fill is set to none

- Create your path using the Pen tool. To create curves, click and hold down the left mouse button while dragging the Pen tool. You may adjust the curves by using the handles
- Click the Esc button to end the path
Create a Closed Path
The steps for creating a closed path are the same as above with the exception of the following:
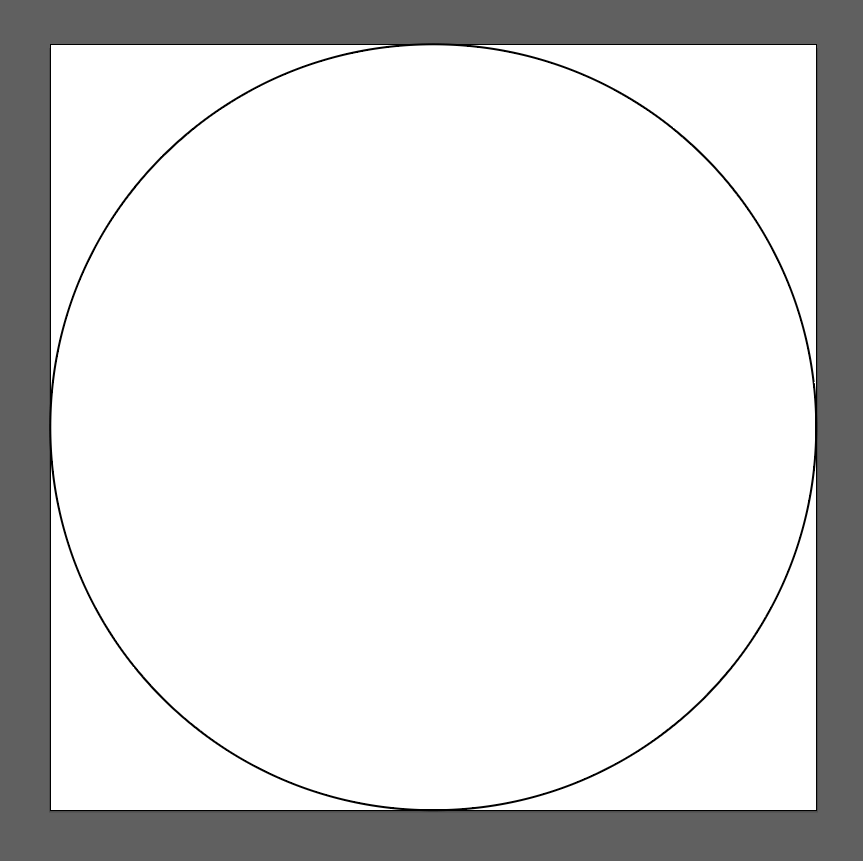
- Create a Closed circle path by using the Ellipse tool.

- Select the closed path and decide on a starting point with the Direct selection tool.
- Choose a point and then click on the “Cut path on selected anchor points”. This action will create a break at the desired place.

- Make sure the path is left open.
Reduce the Artboard
Reduce the unnecessary space, and make sure the Artboard size is the same as the path, using the following steps:
- Click on the path using the Selection tool
- From the primary menu, find and select Object > Artboards > Fit to Artwork Bounds
The Artboard should look like the following example:
Export the Path
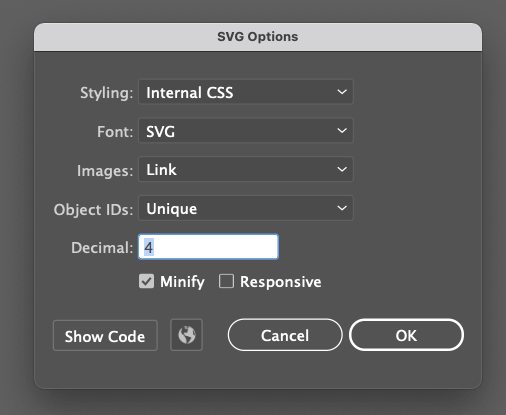
Export the completed path as an SVG file to your computer using the following SVG Options settings:
- Style – Internal CSS
- Font – SVG
- Images – Link
- Object IDs – Unique
- Decimal – 4
- Minify – Selected
- Responsive – Unselected
Creating a path using an online SVG generator
If unable to have access to design software, you can use an online generator to create your path. Follow the instructions provided by the source.
Example Resources
https://yqnn.github.io/svg-path-editor/
https://mavo.io/demos/svgpath/
Clean the Path
When creating a SVG path, the design software or online generator, may add unnecessary styles and attributes. You can remove these attributes with an online SVG cleanup tool. The reduction of attributes also reduces the SVG file size.
Example Resources
https://jakearchibald.github.io/svgomg/
Important: After cleaning the desired attributes, ensure the path is still correct / working. Sometimes after reducing too many attributes, the path will no longer work. Please use this cleanup method with caution.
Upload the Path File
Upload the finished SVG file to your text path widget. Add your text and styles as needed for your project.