When you build a WordPress.org website, there are two things you’ll need before you can publish it — a domain name and a web hosting plan.
A well-chosen domain name managed by a reliable DNS (Domain Name System) provider can improve a website’s discoverability and credibility. A well-chosen hosting plan offered by a top-notch hosting company can impact how well a website performs, which also affects how the audience finds, perceives, and interacts with it.
If you’re here today, then you know that you need a web hosting plan that’s optimized for WordPress in terms of performance, security, scalability, and more. And you’re probably curious about how well Google Cloud Platform stands up against established WordPress hosting providers.
This post will help you make an informed decision about Google Cloud Platform for WordPress. If you decide it’s right for you, we’ll walk you through two options for using WordPress on the Google Cloud Platform.
What Is the Google Cloud Platform?
The Google Cloud Platform (GCP) refers to public cloud computing services provided by Google. It’s on par with Amazon Web Services (AWS) and Microsoft Azure.
GCP itself is not a web hosting solution. What the platform does is host services for:
- Computing
- Storage
- Database
- Analytics
- Application development
- Artificial intelligence
- Networking
- And more
In other words, Google rents out access to its top-of-the-line infrastructure and services to users. So, users aren’t just paying for access to Google’s network — they’re also getting access to its built-in security and performance optimizations.
The Infrastructure Behind Google Cloud Web Hosting
GCP has a dedicated service for hosting called Google Cloud web hosting. To understand where the real value lies in this hosting option, we need to look at the components that power it:
Data Centers
Google has data centers all around the globe. This is where the hardware is based:
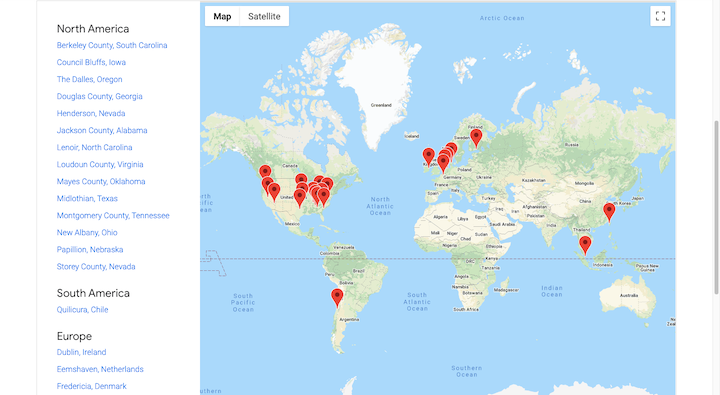
The private, software-defined network that forms the basis of its Cloud services is also quite extensive. Urs Hölzle, the SVP for Technical Infrastructure at Google, told TechCrunch in 2017:
“Over the last 18 years, we built the world’s largest network, which by some accounts delivers 25-30% of all Internet traffic.”
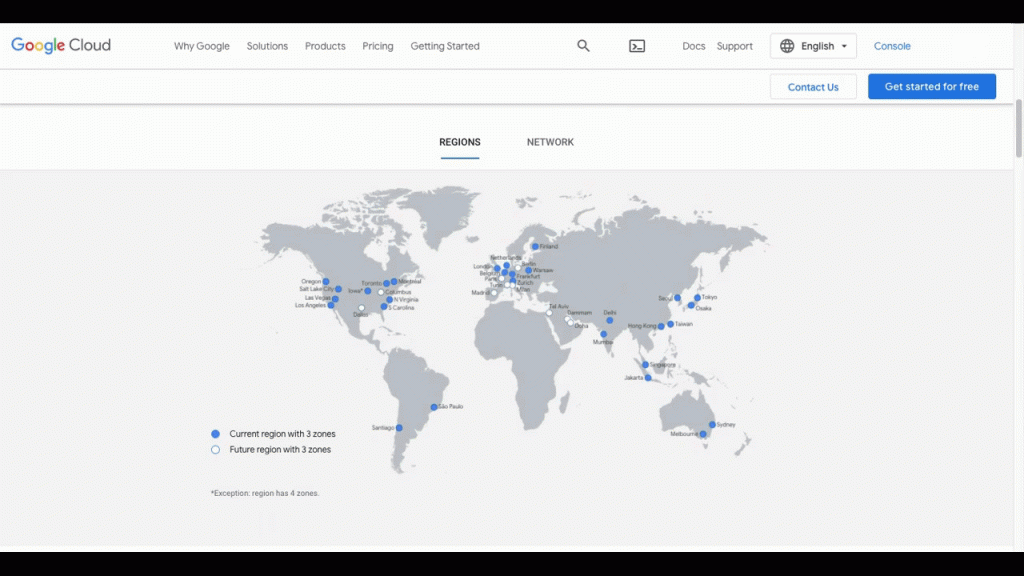
Google offers various Cloud products through this network of edge servers and CDNs.
Virtual Machines
When it comes to web hosting, you have options.
Shared hosting is generally the cheapest hosting available, but it comes with a tradeoff as you have to share server space and resources with other websites. Virtual private server (VPS) hosting gives growing websites the privacy and dedicated resources they need by designating a specific area of a virtual server to use.
Cloud hosting sits somewhere in between the two. Cloud-based websites don’t have to worry about resource-hogging websites using up shared resources. That said, they don’t have a dedicated virtual server to call their own.
With Google Cloud web hosting, in particular, websites are hosted across a system of virtual machines (VM) known as Compute Engine. This is actually the ideal situation as websites won’t be dependent on a single VM nor will their resources be limited.
Resource Management
Speaking of resources, Google Cloud Platform is not a managed hosting solution. This means you’re responsible for configuring your resources.
This isn’t a one-and-done process, though. When you host on the GCP, your resources are under your control and fully scalable. So, let’s say your website suddenly experiences an uptick in activity. You can scale up your resources for that timeframe and then bring them down to normal levels when the traffic spike goes away.
This can be a cost-efficient way of hosting a website. However, it does require regular monitoring.
Monitoring your web traffic in tandem with your hosting resources can be quite beneficial. When you leave it up to Google, social media, and other external channels to push traffic your way, it can lead to unwieldy traffic and unpredictable traffic spikes. A poor-performing site can harm your SEO, as can a server that can’t keep up with demand.
However, by keeping a close eye on your web traffic and carefully planning your website’s SEO, ad campaigns, and other promotions, web traffic will be more even and you’ll be able to stay on top of traffic surges more effectively.
Click-to-deploy WordPress
GCP integrates with WordPress and offers a click-to-deploy option after you sign up for a Cloud web hosting plan:
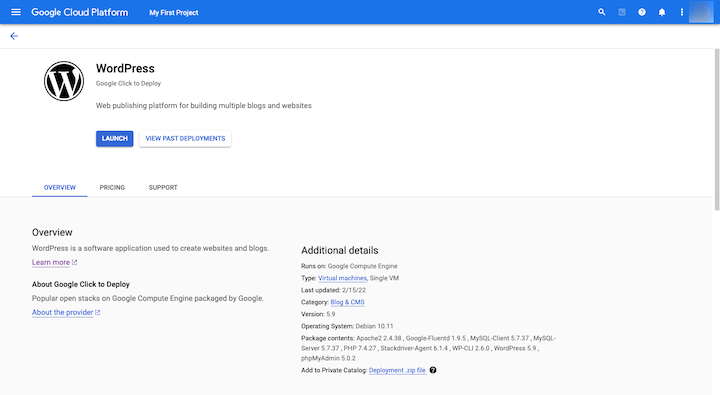
The process of launching a WordPress site on Google Cloud Platform is a bit more cumbersome than with some other web hosting providers. However, it’s due to the configurations that need to be done upfront.
Regarding how much GCP charges for this hosting solution, you’ll pay a monthly fee based on the infrastructure resources you use. Google will give you visibility into the resources your website consumes, so you can make adjustments as you go along.
Why Use Google Cloud Platform to Host a WordPress Site
In general, before you decide on a web hosting company, there are certain traits you want to look out for. Let’s see how Google Cloud Platform measures up against them:
1. Reliability
According to the GCP Service Level Agreement (SLA), customers are guaranteed a monthly uptime percentage of 99.5% for single instance VMs:

So, if there are 720 hours in a 30-day month, that means you can expect your website to be online for at least 716.4 of those hours.
What’s more, the Google Cloud Platform network is widely distributed. If one of its servers should go down or a data center experiences an outage, there are plenty of others to pick up the slack and ensure that all websites on it stay online.
2. Scalability
Google isn’t responsible for managing your cloud hosting plan. You are. This gives you total control over how many resources to allocate to your site over the course of the month and to scale them up and down as needed. There are no limits in terms of scalability, except the costs associated with consuming more server resources.
3. Speed
The GCP network is configured for high bandwidth connectivity and low latency.
This is partly due to how expansive the Google Cloud Platform network is. With Cloud locations around the world, your website traffic won’t have to wait long for data to be transferred to their browsers.
The scalability of the hosting helps, too. If your bandwidth and storage are configured for traffic surges, then there’s little risk of the server getting pushed past its limitations.
Google’s content delivery network (CDN) also deserves a shout-out. When the CDN service is enabled, this gives a website access to even more server locations, which will make delivering static assets to visitors go more smoothly.
4. Security
Google takes security just as seriously for its Cloud customers as it does for itself. It all starts with its data center hardware, which is custom-built for Google. It then employs a team to monitor its data center facilities 24 hours a day.
In addition, data shared over the Google Cloud Platform network is encrypted as it gets distributed across its collection of VMs. The data will be unreadable to anyone but Google.
Backups are also an integral part of GCP security. If any disaster or emergency should take place at one of Google’s data centers, your data automatically gets shifted to another server. That said, there are emergency backup generators in place to mitigate this possibility.
One thing to note is that server-side security is never enough — that goes for all web hosting providers. You’re still responsible for securing your WordPress website no matter how rigorous Google’s security measures are.
5. Cost-effectiveness
When you’re building a website with WordPress, it’s usually because you want the flexibility and power that comes with the content management system. For instance, you want to add as many images as you want, bring your designs to life through animation and integrate with payment gateways to monetize your content.
High-performance WordPress websites can put a lot of strain on a web server and demand extra resources to power through traffic surges.
Your monthly hosting fee directly pertains to the number of resources you’ve allocated to your site. So long as you don’t take on more than you need from month to month, and adjust as needed, GCP hosting could be a cost-effective option for a bustling WordPress website and a growing business.
How To Install WordPress on Google Cloud Hosting
There are two methods you can use to install WordPress on Google Cloud. Here’s the process you’ll follow for each:
Option 1: Install WordPress Directly on the Google Cloud Platform
One option you have is to go directly to Google, buy a hosting plan, and then manually install WordPress on the Platform:
Step 1: Visit the Google Cloud web hosting page
Get started setting up your plan on the Google Cloud web hosting page.
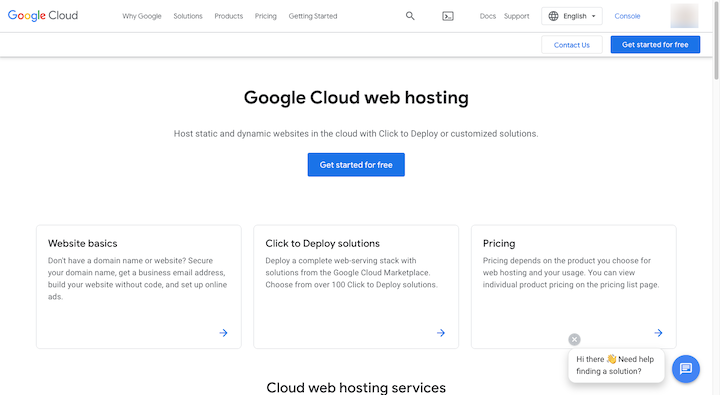
Click the “Get started for free” button at the top of the page. If you’re not already logged into Google, it will ask you to do that first.
Step 2: Add your account information
Next, Google will display your Gmail account at the top of the page. If it’s not the right one, click “Switch Account”.
You can then fill in some basic account information as it pertains to hosting:
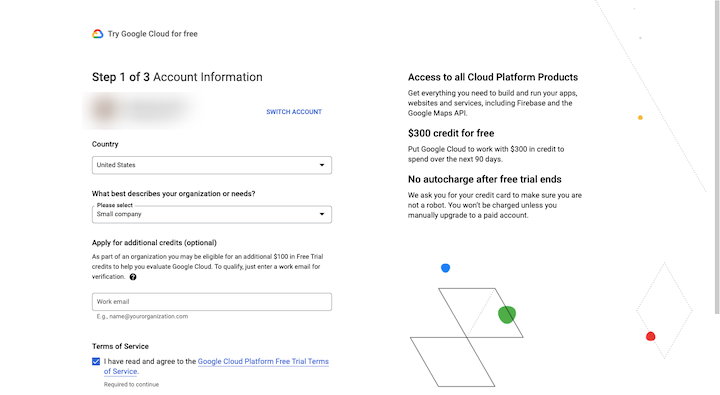
Select the country your business operates out of as well as the type or size of business.
On the right, you’ll see information about the $300 credit you’ll receive for signing up. The trial is 90 days and you won’t have to pay for your Google Cloud hosting until the trial ends or you use up your credits.
On the next screen, Google will ask you to input your phone number so it can confirm your identity. Enter the verification code you receive.
The last screen will ask for your payment information:
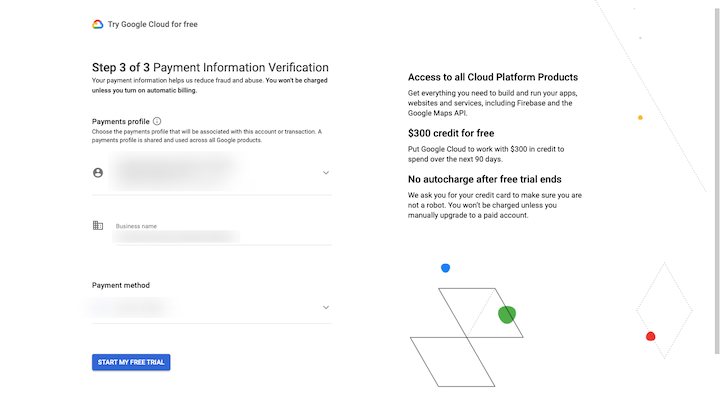
If you’re currently using another Google product for your business (like Google Ads), your payment information will be pulled into this page. Otherwise, fill it in and then click “Start My Free Trial”.
Step 3: Deploy WordPress
The next thing you’ll see is a pop-up asking just a couple more questions about what you’re looking to do with GCP. Fill in the answers to the best of your ability. Google will give you some options similar to this:
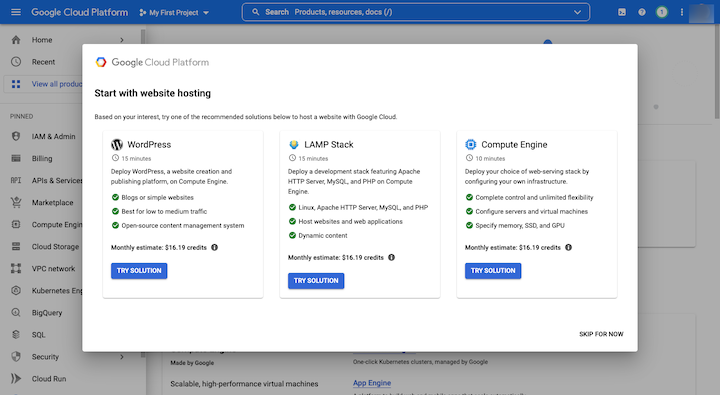
The one you’re looking for (“WordPress”) is the one you see here on the far-left. However, if WordPress is not offered as a website hosting option, that’s okay. Click “Skip For Now” in the bottom-right corner.
Click on “Marketplace” under the “Pinned” sidebar. In this search bar, type “WordPress”. Dozens of matching options will appear, but it’s this option you want to select:
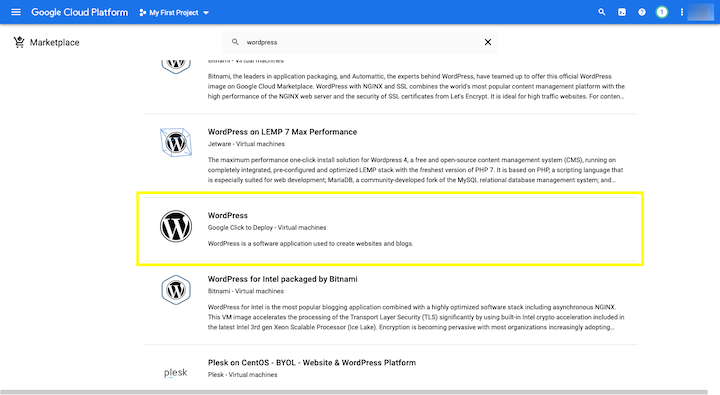
It has a black-and-white “W” logo and says:
WordPress
Google Click to Deploy – Virtual machines
Select this option.
Before you click the “Launch” button at the top of the page, scroll down and review the proposed pricing:
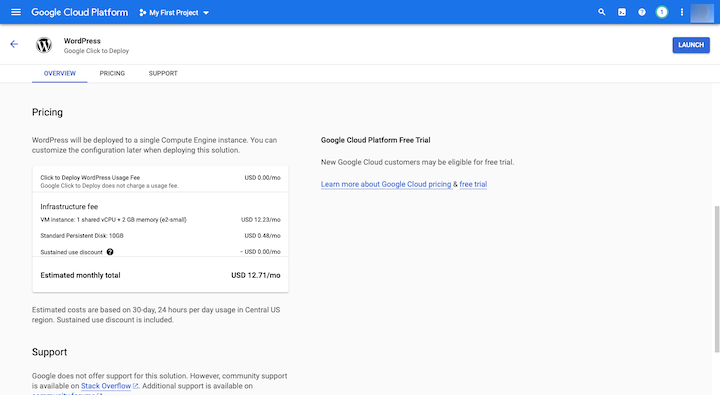
If you’re okay with this as a baseline, click to deploy WordPress. If any of the required APIs are disabled on your VM, Google will ask you to enable them on the next page:

Step 4: Configure the new WordPress deployment
This is where you’ll configure the settings for your cloud hosting plan:
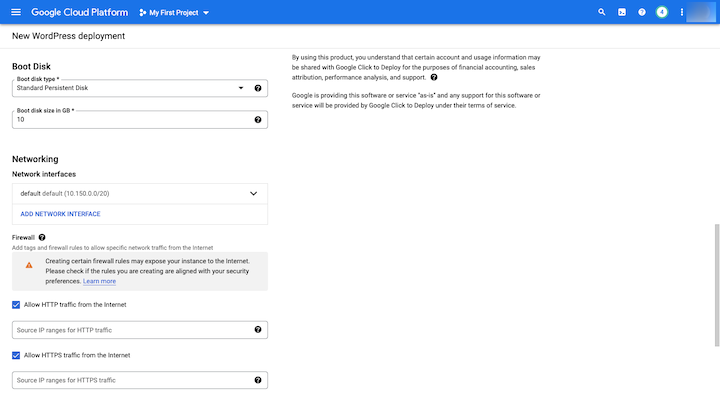
The first details to pay attention to are the Deployment name (make it specific) as well as the Zone.
The zone determines a couple of things. The first is what sort of Google Cloud Platform resources are available to you. The other is where your data will be stored on the network. So get as close to your location (or the location of your target audience) as possible.
What you choose under Machine type will greatly affect the number of resources available to you as well as the associated costs. For example:
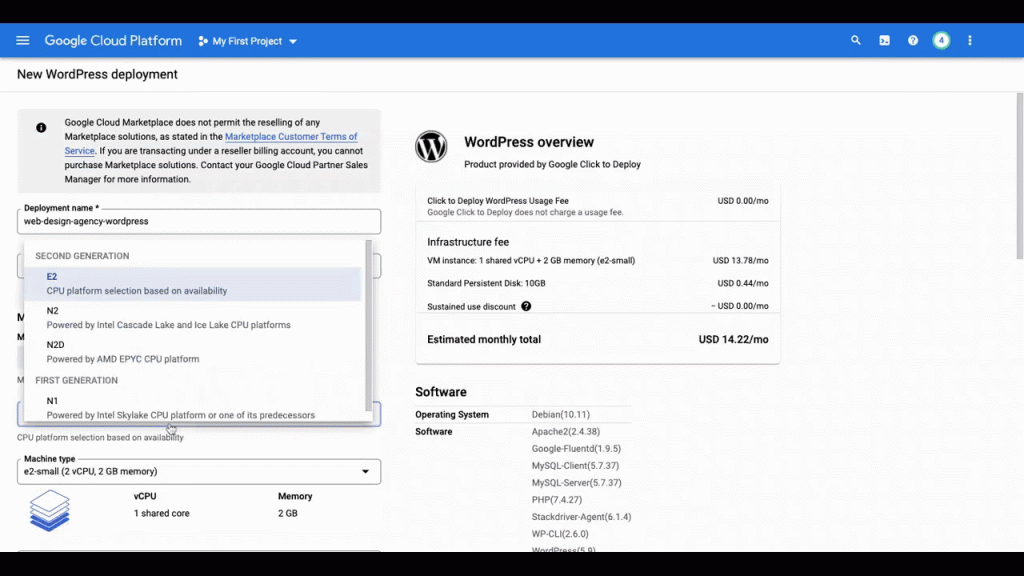
The default is a General-Purpose VM. The E2 machine series and e2-small machine type include the following:
- 1 shared virtual CPU
- 2 GB of memory
Without any other changes made to the configurations, this would cost $14.22/month. Configurations like these are good for websites with standard functionality and low to mid-levels of traffic.
When I switch to Compute-Optimized machine families, though, the cost goes up a lot. But that makes sense for a website with intensive workloads (like busy ecommerce or news sites with tons of streaming content).
Also, notice what happens when I switch to Memory-Optimized. Not only does the price range in the thousands per month, but the region I selected (us-east4-a) is unable to handle those types of workloads. So you’ll get some help from Google in terms of choosing the right resources before you step inside your site.
There are a few other things to configure on this page:
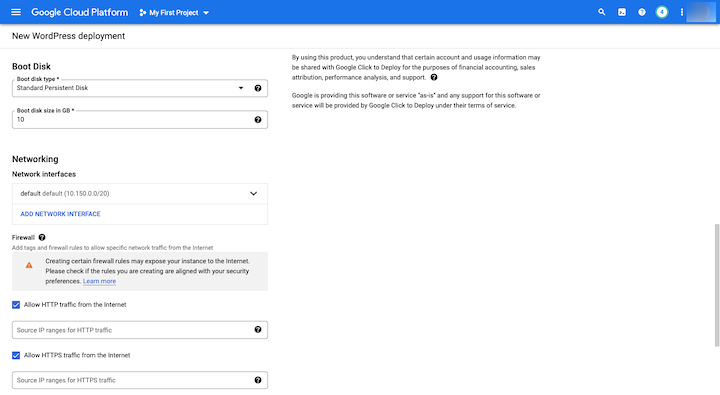
You can change the following:
- Admin email address
- phpMyAdmin access
- Boot Disk size
- Networking and Firewall rules
- Stackdriver logging and monitoring
When you’re done configuring your settings, review the price in the top-right box one more time. Then, click “Deploy” at the bottom of the page.
Step 5: Use your login credentials to get inside your WordPress site
It may take a couple of minutes for the Deployment Manager to run. When it’s done, you’ll see a page that looks like this:
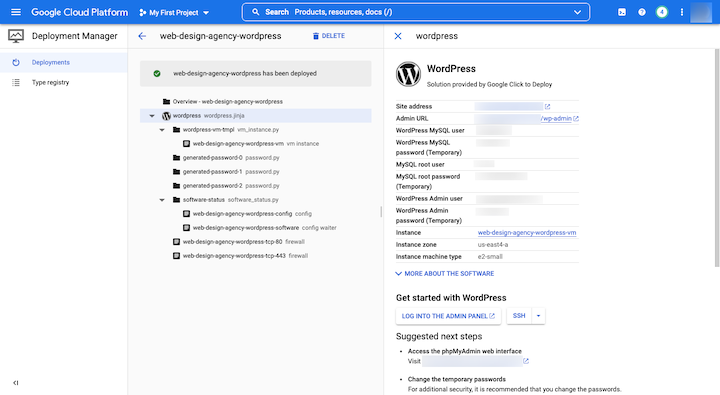
On the right side of the screen is all the information related to your new WordPress installation.
You’ll find your Site address and Admin URL, which are using an IP address since no domain name has been designated yet. You’ll need to map a custom domain to your site at some point. Follow these directions from Google to do that.
You’ll also find all of your login information for:
- WordPress MySQL
- MySQL root
- WordPress Admin
Change these as soon as possible. To update the MySQL user passwords, follow these instructions. Google also suggests updating your phpMyAdmin information under “Suggested next steps.” Follow the link given to do this.
To update the WordPress admin password, log into your new WordPress installation using the wp-admin link at the top. Go to Users and then update your password on the next screen using WordPress’s secure password generator.
Step 6: Install a Website Builder and Start Designing Your Site
Once you step inside of WordPress, that’s when the real work begins. However, you probably won’t be able to depend solely on WordPress’s drag-and-drop builder to build out your pages or design your site.
You’ll find lots of website builders in the WordPress repository. However, if your goal is to create a website that’s attractive, engaging, and high-performing, Elementor is the one you’re looking for.
Option 2: Create an Elementor Cloud Website
The other way to build a WordPress website on GCP is by using the hosted Elementor Cloud Website solution. This option is worth considering if you want to remove all those technical barriers associated with having to wrangle the hosting, domain, and platform yourself (just look at all that Option 1 entails).
Elementor Cloud Website is the hassle-free, end-to-end solution for WordPress. Hosting, domain, and platform are all rolled into one and the process of getting started is simplified. Rather than stress over the technical details, you’ll be inside your tricked-out WordPress installation in a matter of minutes.
If you’d like to learn how to get up and running with WordPress on the hosted Elementor Cloud Website solution, follow these steps:
Step 1: Visit the Elementor Cloud Website
Get started setting up your Elementor Cloud Website here:
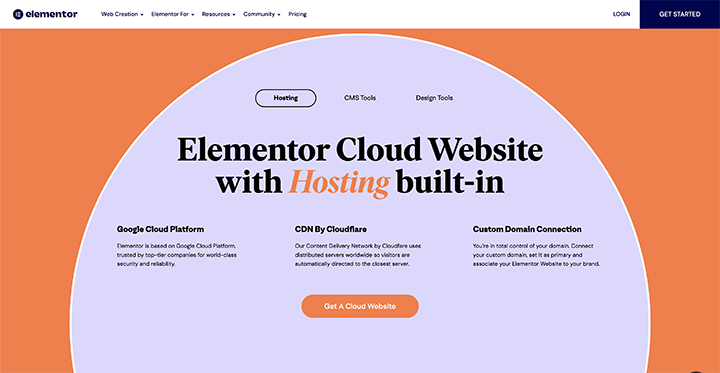
While this option enables you to use GCP hosting, there are some differences between the Google offering and Elementor’s:
First, this is an all-in-one solution. When you create an Elementor Cloud Website, you get the following:
- Built-in GCP hosting
- Cloudflare CDN*
- Cloudflare SSL certificate*
- 100 GB of bandwidth
- 20 GB of storage
- 100K monthly visitors
- Automated backups every 24 hours
- Manual backups are available*
- Pre-installation and activation of WordPress, Elementor Pro features, and the Hello Theme*
- Free sub-domain at elementor.cloud or free connection to a custom domain*
- Premium support*
The asterisked (*) items are ones that are unique to Elementor’s solution. These additional features will help remove the friction in the website setup process, so you can get started quickly and focus more of your time and attention on creating websites.
One other thing worth noting is how Elementor Cloud Websites are priced. You’ll have one fixed price and a one-time payment to make every year. There are no hidden or variable fees. Not only is this a cost-effective solution, but it’ll bring greater predictability and stability to your web design business.
Feel free to peruse the landing page above for more information on the hosted Elementor Cloud Website solution. When you’re ready, click the “Start Creating” button.
Step 2: Buy your Elementor Cloud Website plan
The next screen will show you what comes in your plan along with the associated costs. Review them (along with the money-back guarantee). “Click “Buy Now” to get started:
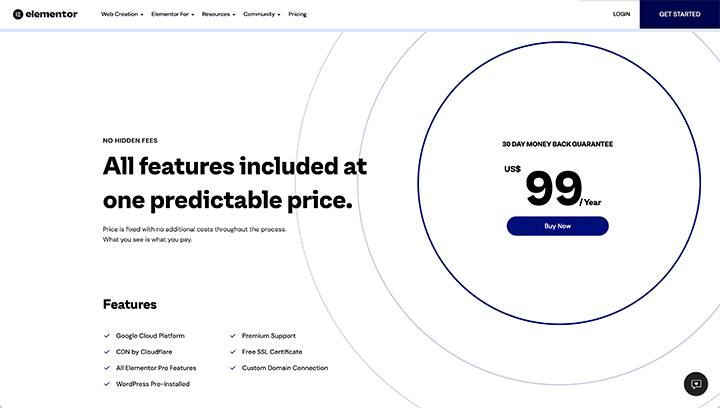
If this is your first time using Elementor, you’ll have to add your account information along with your payment information.
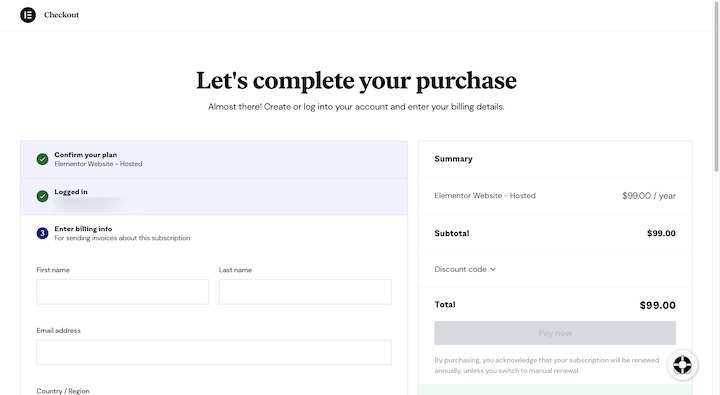
Fill in the forms, review the details and then click “Pay now” when you’re done.
Step 3: Go to the My Elementor dashboard to manage your subscription and website
After you complete your purchase, you’ll be taken to the My Elementor dashboard. This is where you’ll manage your websites, subscriptions, and teams.
The first thing to do is go to the Subscriptions tab:
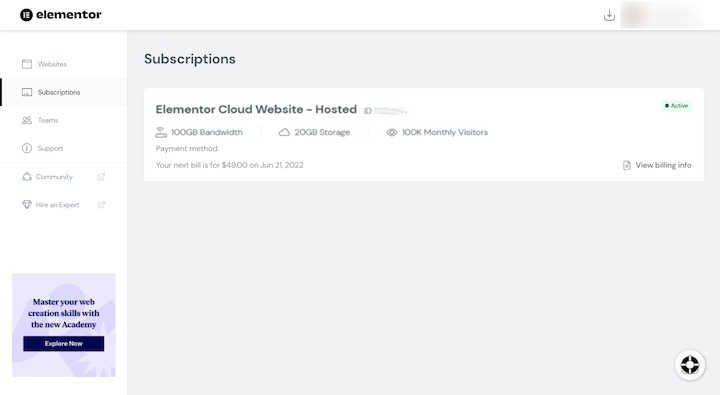
All of your existing Elementor subscriptions will be here. To make changes to your Elementor Cloud Website subscription, click on the block. You can then manage the details of it on the next page, including whether you want it to auto-renew or manually renew.
Next, go to the Websites tab:

Your pre-installed WordPress website will be sitting there waiting for you on the dashboard. If you click on the three vertical dots on the right side of the block, you’ll open up additional options:

You probably won’t need to do anything with these options now. Just know that they’re here if or when you want to use them.
Step 4: Log into your WordPress dashboard
To access your WordPress dashboard, hover over the thumbnail image in the box, and you’ll see this:

Click on “Open WP dashboard” to visit WordPress.
Before you start building your site, go to Users and update your login credentials using the secure WordPress password generator.
Step 5: Connect your domain
Before you finish designing your site and officially launch it, make sure you’ve settled on a permanent domain name.
You can use the free elementor.cloud sub-domain name assigned to your website during signup. Or you can connect a custom one your client bought for the site. To associate your site with a custom domain, return to My Elementor. Then, follow these steps.
Conclusion
Cloud hosting for WordPress websites seems like a no-brainer. Speed, security, scalability, and reliability — while you might have to worry about these things with cheaper shared hosting or unreliable providers, that won’t be the case with Google Cloud Platform web hosting.
If you and your client want to leverage the GCP to host your WordPress site, you have a couple of options to consider. Would you prefer to go directly to the Google Cloud Platform and manually configure your server and install WordPress? Or would you prefer a simplified yet feature-packed solution like Elementor Cloud Website?
It all depends on how much control you need and want over your server and hosting plan. Consider the pros and cons of each, and then pick your preferred method.
Looking for fresh content?
By entering your email, you agree to receive Elementor emails, including marketing emails,
and agree to our Terms & Conditions and Privacy Policy.
