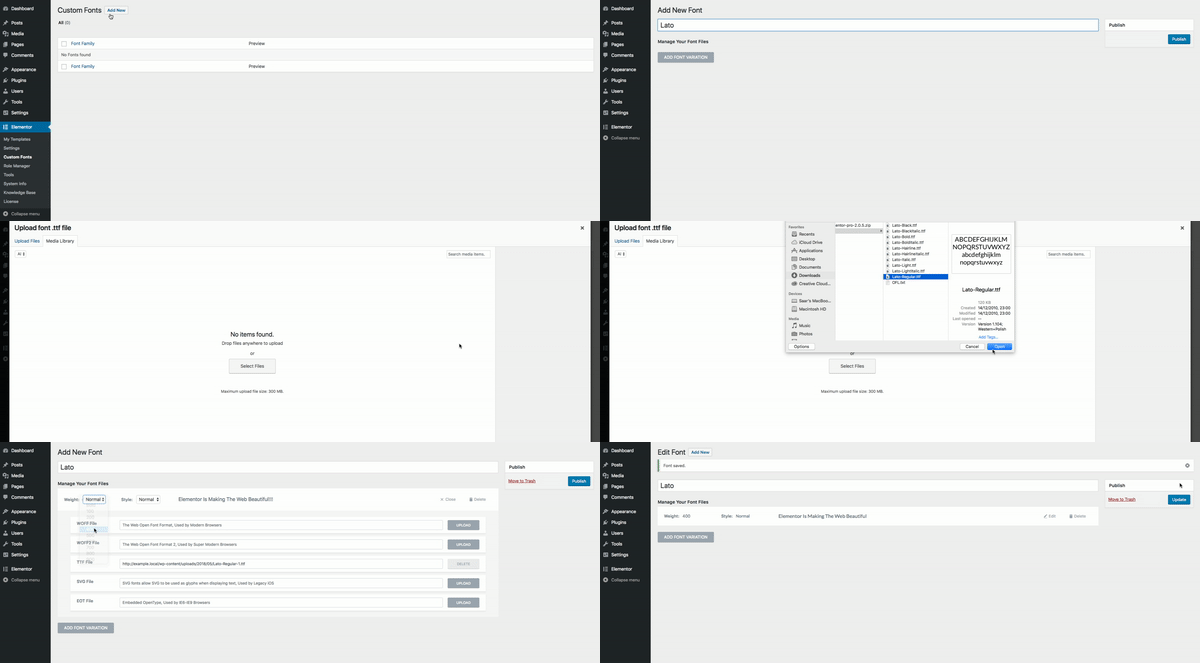
If you need more than the 800+ Google Fonts that come With Elementor, you can easily add Custom Fonts to your website. Watch this short video.
Upload Custom Fonts
- Go to the WordPress dashboard, under Elementor > Custom Fonts
- Click Add New
- Give your font a name and click Add Font Variation
Note: Uploaded fonts are stored in the wp-content/uploads/ folder on your server.
Available Font Formats Include:
- The Web Open Font Format (WOFF) – WOFF is the most recommended format to use, since it is supported by all modern browsers
- The Web Open Font Format (WOFF 2.0) – TrueType/OpenType font that provides better compression than WOFF 1.0
- TrueType Fonts (TTF) – This font was developed in the late 1980s, by Apple and Microsoft
- SVG Fonts/Shapes – SVG fonts allow SVG to be used as glyphs when displaying text. Make sure to use this format to support old versions of iPhone
- Embedded OpenType Fonts (EOT) – This font file works on IE, but not on other browsers. Make sure to use this format to support earlier versions of IE
Weights & Styles
- Choose a Font Weight. Although all weights will be shown, please only select a weight that your custom font supports. Learn more.
- Select a Style
- Click Publish
- Repeat for every font variation

Viewing your Custom Fonts
You will find the newly added fonts when you edit text with Elementor.
- Go to the STYLE TAB
- Under Typography > Family you’ll see your new Custom Fonts.
If you’re using Typekit fonts, please see this article.
Troubleshooting
If you experience issues, check this guide.