Note: Elementor has updated its domain registration process. See Adding a custom domain name to your Elementor hosted website for more details. However, the information here regarding Bluehost is still accurate and can be used to help locate your domain name records on the Bluehost site.
In this how-to we’ll show you how to connect your Bluehost domain to your Elementor hosted website.
Getting started
- Go to your My Elementor dashboard and navigate to Websites.
- Click the Manage This Website button located on your website’s card to open the site details screen.
- Select Manage Domains.
- Click Add Custom Domain.
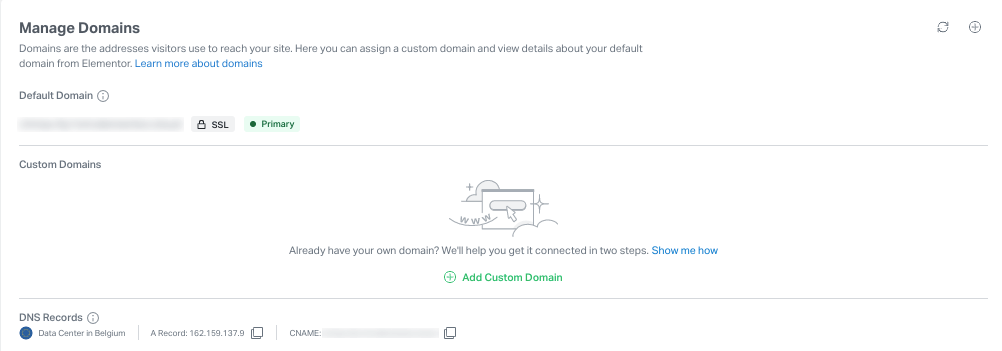
A pop-up screen will appear.
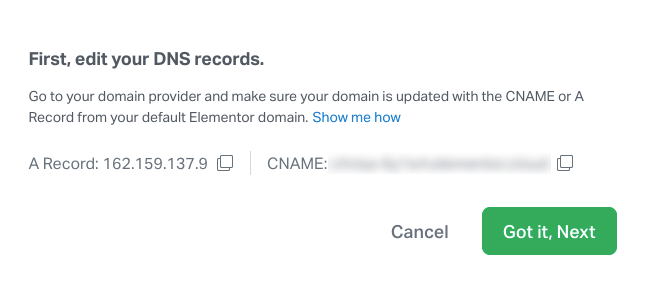
Keep this screen open because you’ll need to copy the information to your Bluehost account.
Adding the DNS records
- Open another browser tab.
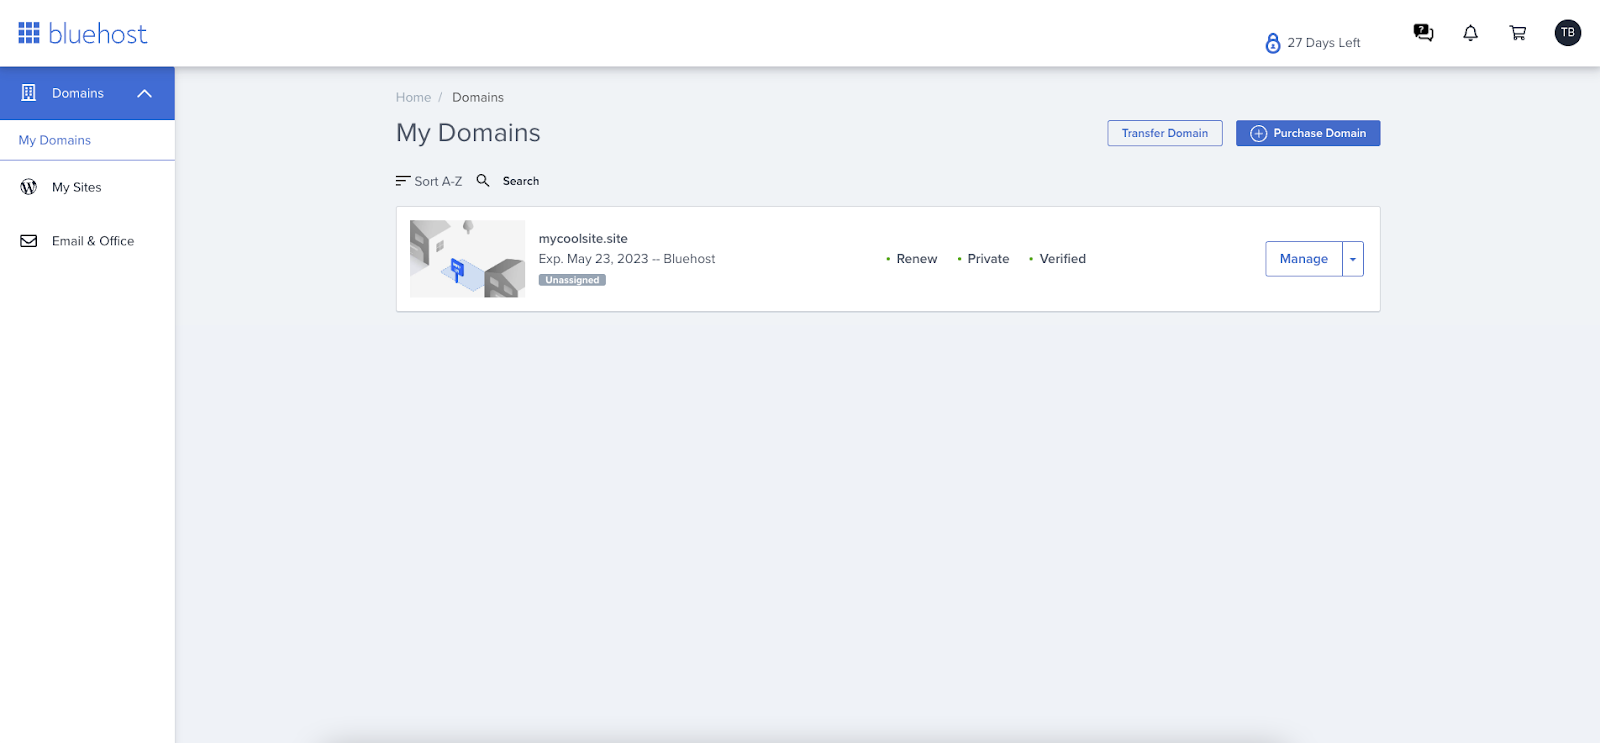
- Go to https://www.bluehost.com/ and log into your account.
- Navigate to the domain you want to use for your Elementor hosted website in My domains.
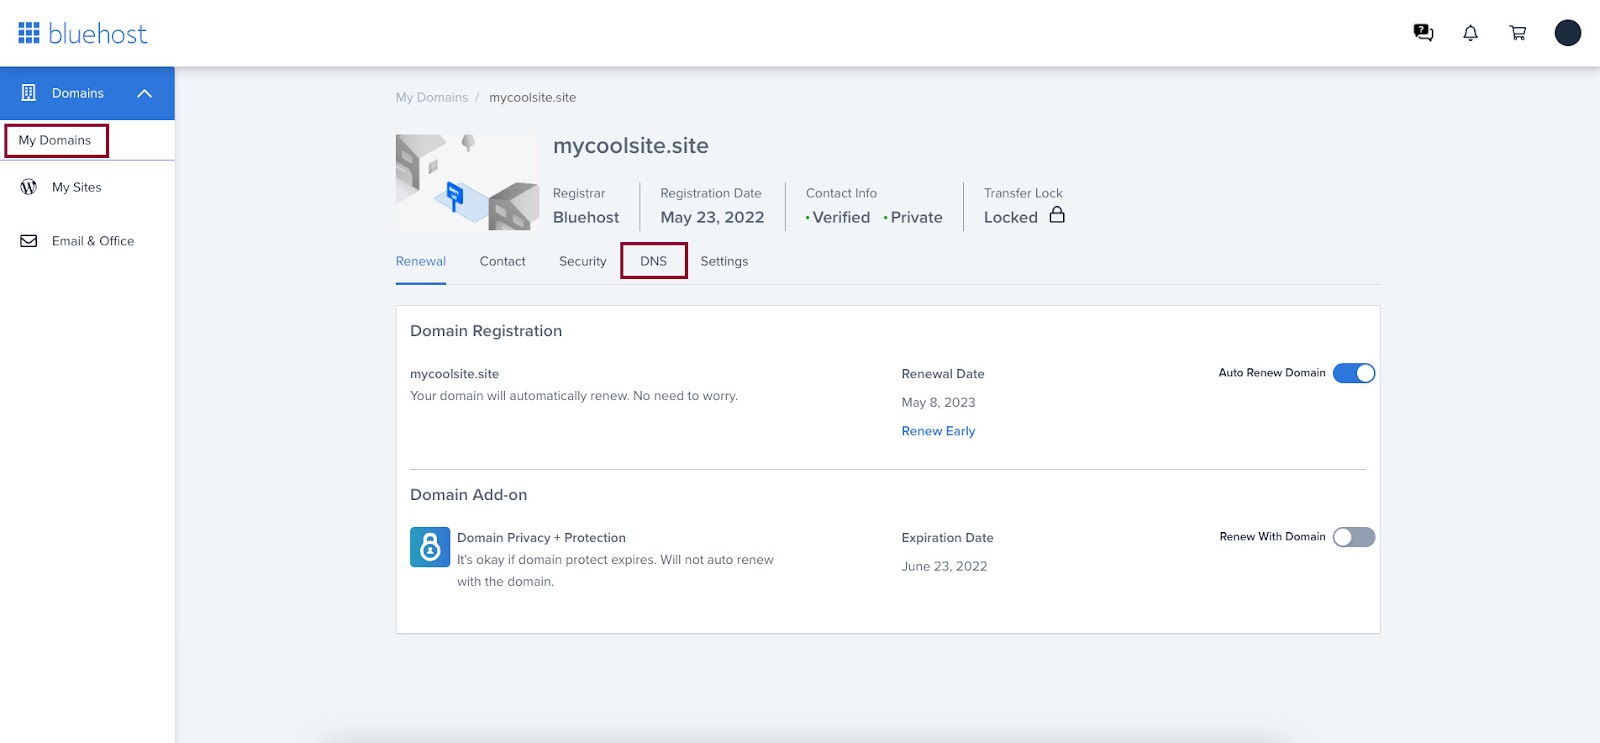
- Click Manage.
Here you’ll see your domains! - Select the DNS tab from the domain management screen.
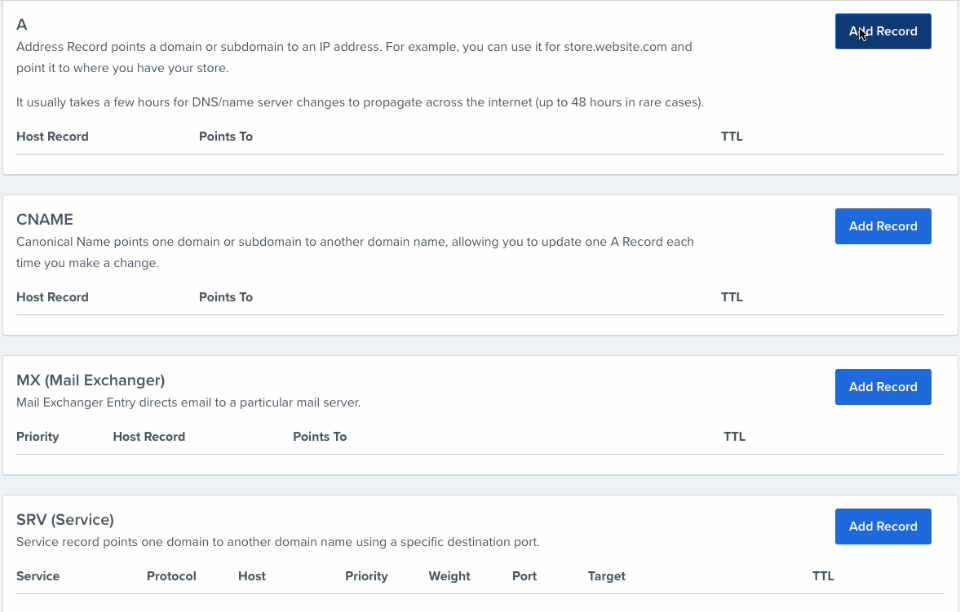
Add an A record
Important: If your domain’s DNS records have an AAAA (IPv6) record set, you need to delete it. IPv6 isn’t compatible with Elementor hosted websites yet.
- Navigate to the DNS Manager section of the DNS management page. If your domain already has an A record set to Parked or another address you should delete it.
- Click Add Record.
- Go to the Host Record field.
- Enter the primary domain or ‘@’ symbol (root).
- Go to the Points To field and enter the IP address of your Elementor hosted website. You can find this IP on your My Elementor dashboard page.
- Open the TTL dropdown menu and select the 4 Hours option.
- Click Save.
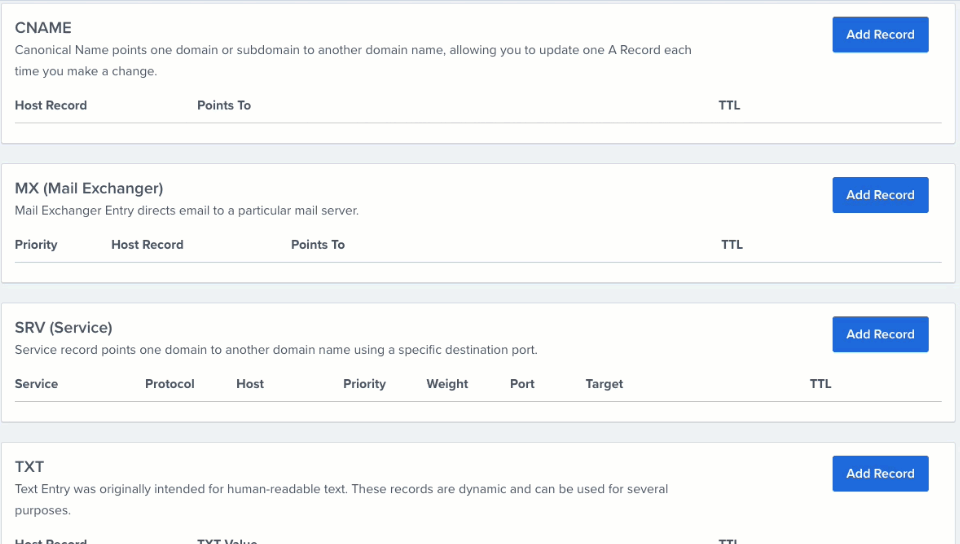
Using a CNAME record for the “www” address
To direct the “www” address to your Elementor hosted website, you have to create a CNAME record with the host name set to “www”.
- Go to the DNS manager.
- Navigate to the CNAME section.
- Select Add Record.
- Go to the Host Record field.
- Enter “www”.
- Go to the Points To field and enter your primary domain.
- Open the TTL dropdown menu and select the 4 Hours option.
- Click Save.
Alternative CNAME method
You can also point your domain to your cloud account by adding a CNAME record that points your domain to your Elementor hosted website domain.
If your domain name is example.com and your Elementor hosted website is example.elementor.cloud, you can create a CNAME record with example.com that points to example.elementor.cloud.
Wait for the DNS changes to propagate
DNS servers across the world periodically check for changes to the DNS records. A DNS change typically requires up to 72 hours to apply worldwide, although this usually happens within a few minutes to a few hours.
Return to the My Elementor dashboard
- Go to the Elementor Dashboard browser tab.
- Click the green accept button.
- Return to this step by clicking Add Custom Domain Button (if the pop-up has been closed).
Adding your custom domain name in Elementor
- Enter your domain name without “www” in the next pop-up.
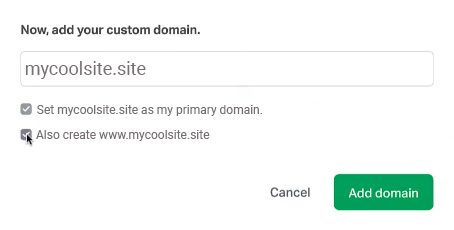
Your custom domain name will be different! - Set your domain as the Primary Domain if needed.
- Create the “www” address.
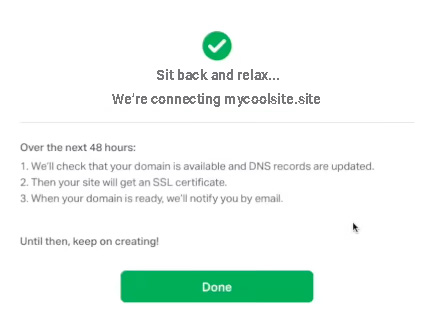
Wait for Elementor to connect to your domain
Sit back and relax. Once you’ve completed the steps above, Elementor will attempt to connect to your Google account DNS records. This process could take up to 72 hours for all the changes to propagate.
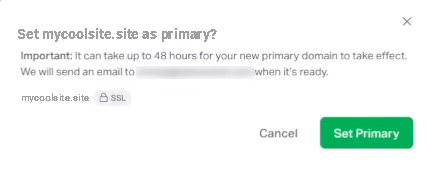
Setting the custom name as primary
- Click the Set Primary Domain link beside your custom domain name. A pop-up will open.
- Select Set Primary. The popup window will close. It takes 30 seconds to several minutes for the changes to appear.
- Check your email inbox for a confirmation.
The bottom line
In this how-to we’ve taken you through the steps needed to direct web traffic to your website. Once you’ve completed the steps above, we’ll check that your DNS is available along with the SSL certificate for your website. This process can take up to 72 hours due to the time it takes for changes to propagate. When your domain is ready, you’ll be notified by email.
To get the most out of Elementor, check out the Elementor Academy for more learning resources. If you have any issues or need help, please contact our Support Center.