Elementor has developed import and export tools to help you migrate your website in just a few simple steps. While there are third-party plugins for exporting websites, these plugins are not supported by Elementor and may break your site.
Note: Your third-party subscription plugins will need to be disconnected from your old site and connected to your new site.
Now let’s get started.
Preparing your new site
First, make sure your new site’s infrastructure matches your existing site. Make sure that all the plugins installed in your existing site are installed in your new site and updated to the same version.
Using the Elementor Import/Export Tools
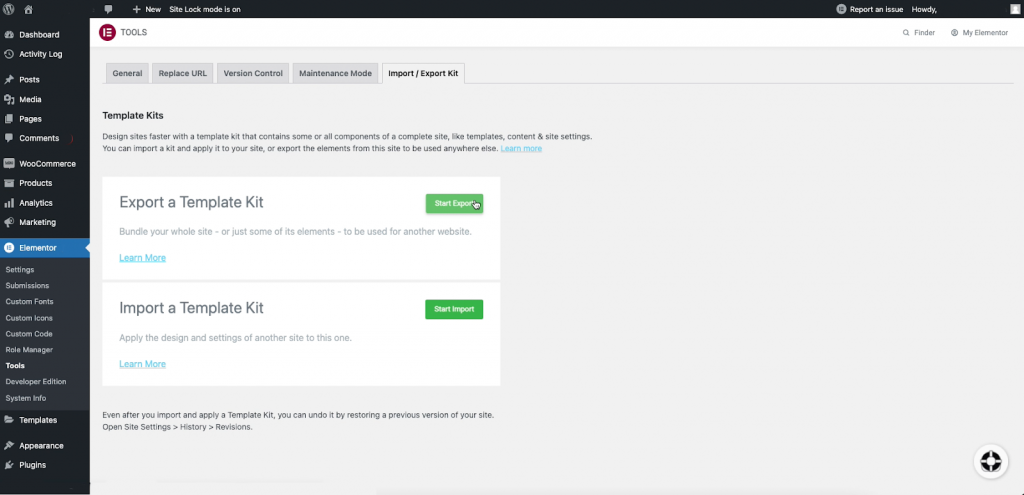
Part 1: Exporting your current site
The Export Kit function will save you time by allowing you to export your entire Elementor content or selected content from one website and import it into another using the Import Kit function.
To use this feature, activate the Import / Export experiment via Elementor > Settings > Experiments. Once you activate the new Import/Export functionality experiment, you will be able to find the options located in Elementor > Tools
Export Options
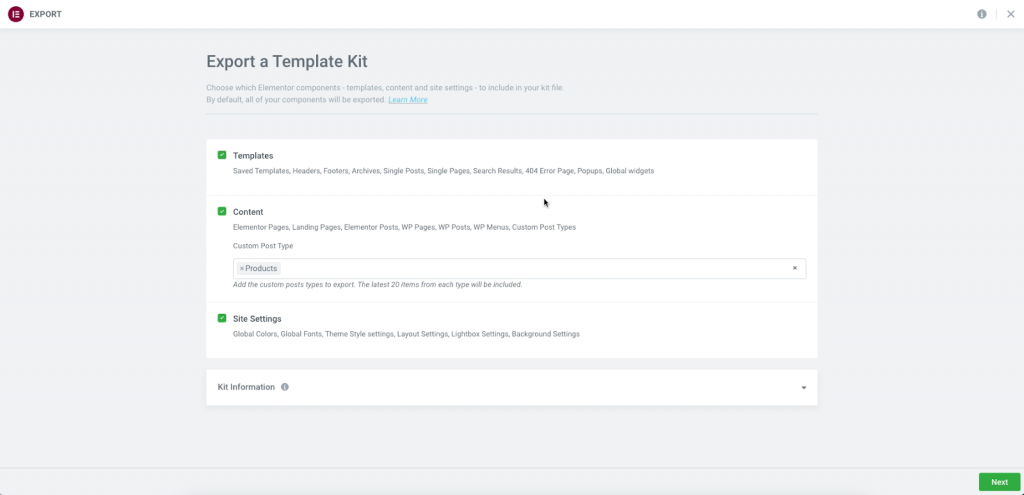
Choose which Elementor components – pages, custom post types, site settings, headers, etc. – to include in your Export file. By default, all of your components will be checked for export.
Templates: Exports saved templates and Theme Builder Templates, such as: headers, footers, single posts, etc. This will also export Global display conditions such as “Entire Site”, “All Singular”, “All Posts”… specific conditions will not transfer.
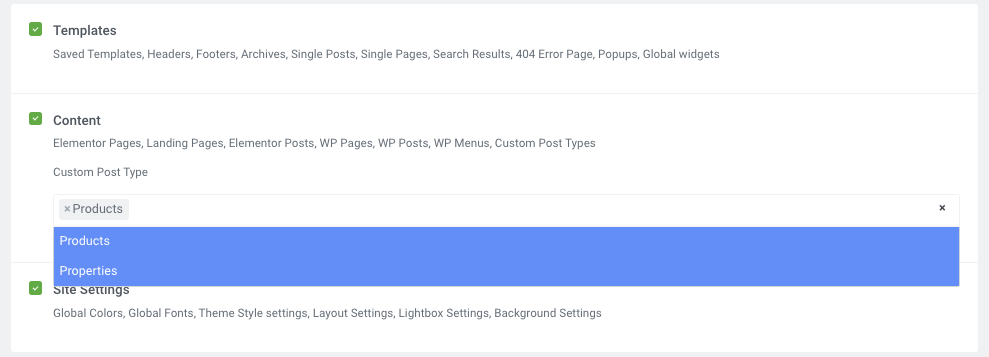
Content: This option exports all Pages and Landing Pages that have been created with Elementor. WordPress menus, pages, posts, Custom Post Type content created by additional plugins such as WooCommerce and CPTUI plugins will also be exported if selected.
If you have Custom Post Types, you may select/deselect these in the field. Click the X to delete items if you do not wish to export these to the new site.
At this time the number of pages, posts, and CPT’s to be exported is limited to 20 items per post type.
Site Settings: This exports the Global Site Settings. Global Colors, Global Fonts, Theme Style settings, Layout Settings, Lightbox Settings, Background Settings will be saved and exported.
Kit Information
In this section, you may give your Export Kit a name, and custom description for later use and organization.
Choose Plugins to Export
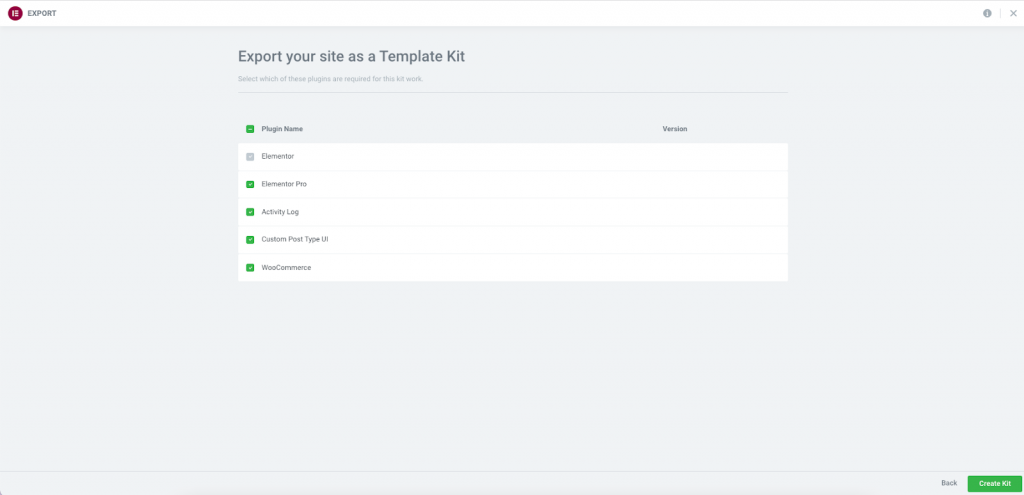
You may now choose the plugins that you wish to export to your new website. The Importer will prompt you and ask if you wish to install these plugins on your new location if they are not already installed there.
Export The File
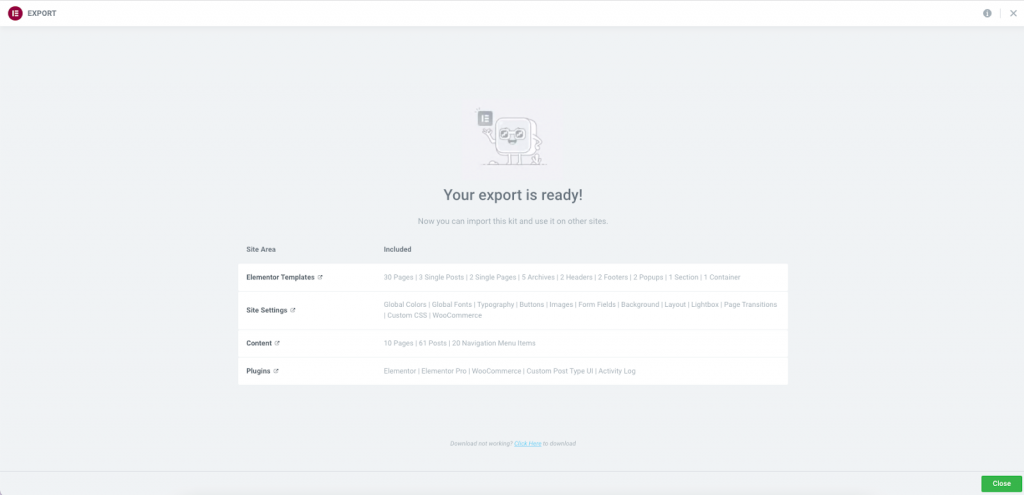
After selecting your options, click the green Create Kit button in the lower corner of your screen. This will bundle the files and automatically start exporting via a .ZIP file saved to your local computer. You will then be prompted to return to the dashboard in the lower corner of your screen.
Great! This completes the export process.
-Now switch to your new Elementor hosted account.-
Part 2: Importing the content to your Elementor hosted website
By using the Import Kit function, you may import your packaged Elementor Export Kit from another website.
To use this feature, activate the Import / Export experiment via Elementor > Settings > Experiments. Once you activate the new Import/Export functionality experiment, you will be able to find the options located in Elementor > Tools
To Import your Export Kit from another website:
From Elementor > Tools > Import / Export click the Start Import button. The Import Kits page will open
Upload your zip file
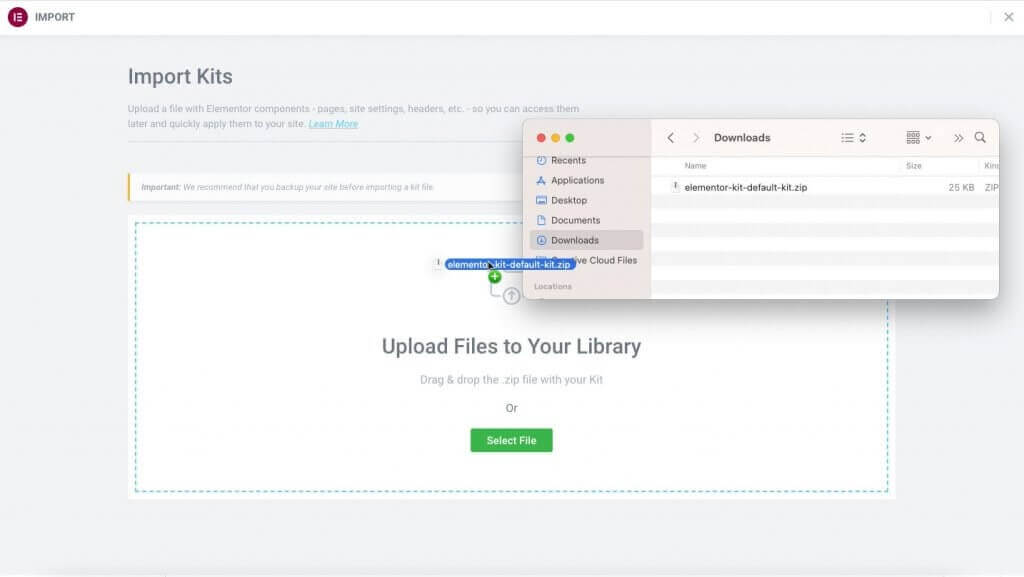
Drag your Export Kit .ZIP file to the area provided, or click to select the .ZIP file from your local computer
Choose the plugins to Import
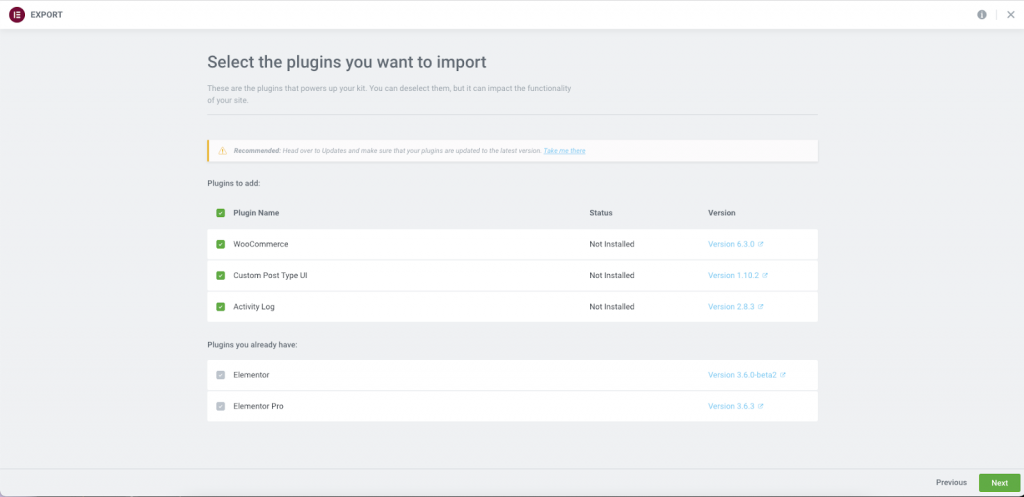
Select the plugins you wish to be installed from your old location. Only plugins that are available in the WP repository can be imported. Paid pro plugins from third parties will not be installed.
Select content to be imported
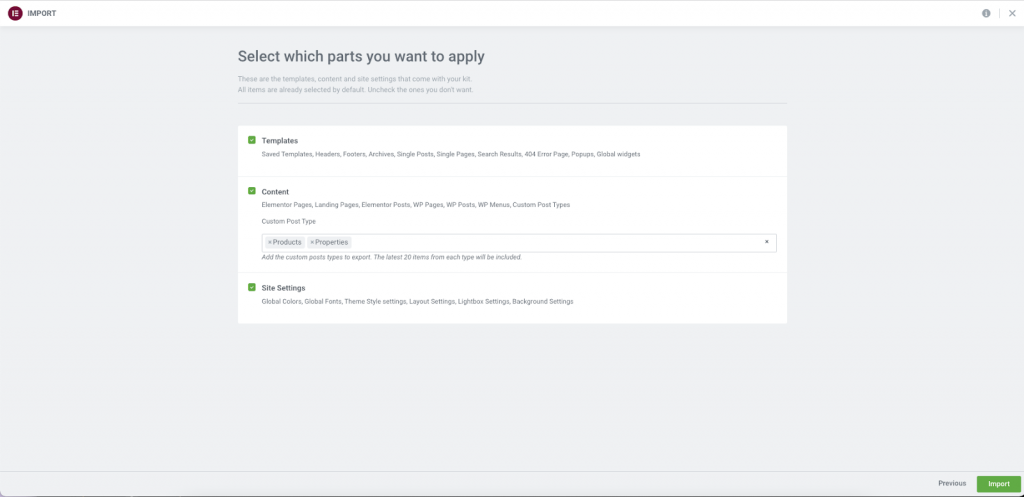
You will now be asked to select which parts you want to apply. By default, all items are checked. Click the Import button.
Enabling unfiltered file uploads
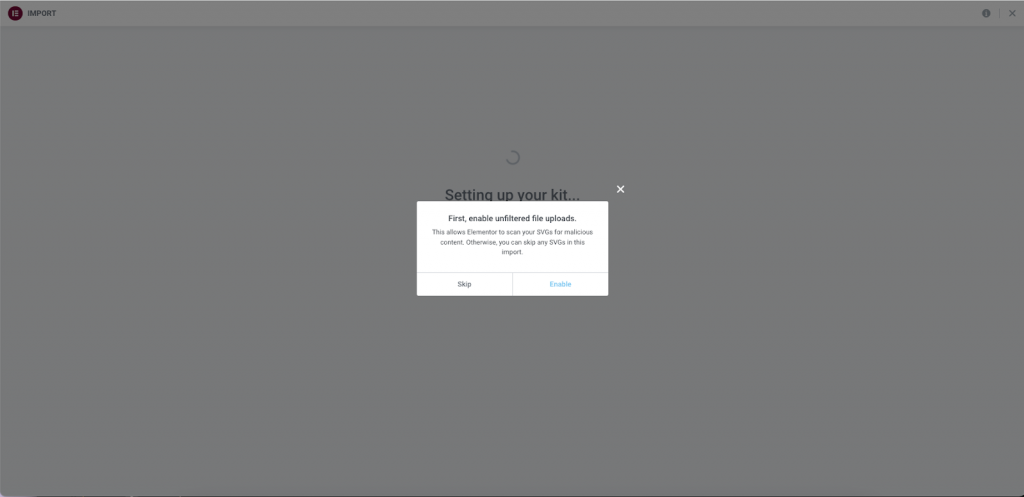
A popup message may appear at this time. If you have not enabled unfiltered file uploads on your new website yet. This will allow the installer to import SVG files for icons and other needed content.
Importing the Theme Builder templates
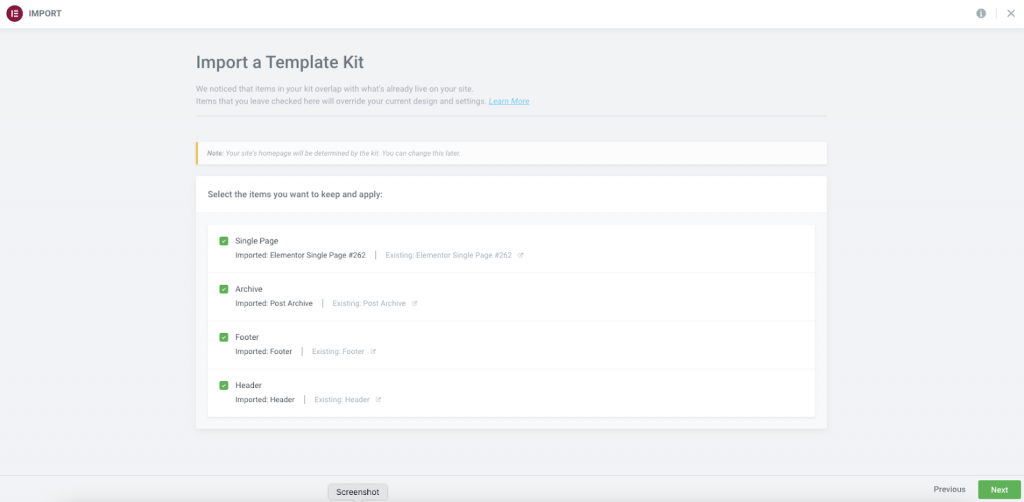
The importer will notify you of any Theme Builder templates that are currently in use on your existing website and give you the option to overwrite each.Templates left unchecked will still be imported, however, the display conditions will not be set. Choose the most appropriate options for you at this time.
Start the import
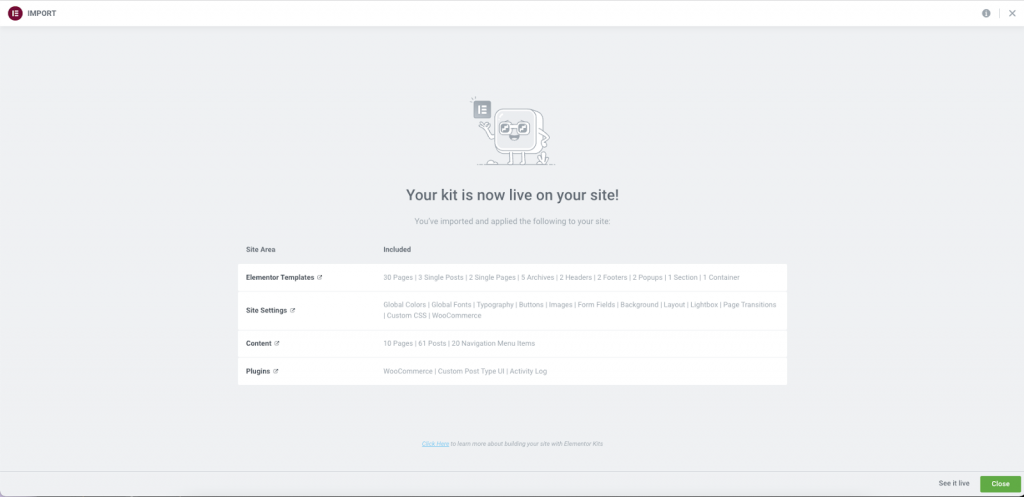
Click the green next button to begin. The process will start immediately. Depending on your file size, the process will take several seconds to a couple of minutes to complete. Once completed, you will be prompted to return to your dashboard.
Important: We recommend that you backup your site before importing a kit file.
Tip: If you develop your website locally using Local by Flywheel, Xampp, or other server solutions, you must allow inbound traffic to your web server. The importer must be able to reach the source files in order to grab images and other dependencies. This is done by enabling the Live Link (Local by Flywheel), or by Port Forwarding on others. Refer to your server documentation. If unable to do so, you will need to manually replace the missing dependencies on the new website.
Finishing Up
Now that you’ve migrated your content, there are a couple more steps you can take to ensure everything is running smoothly.
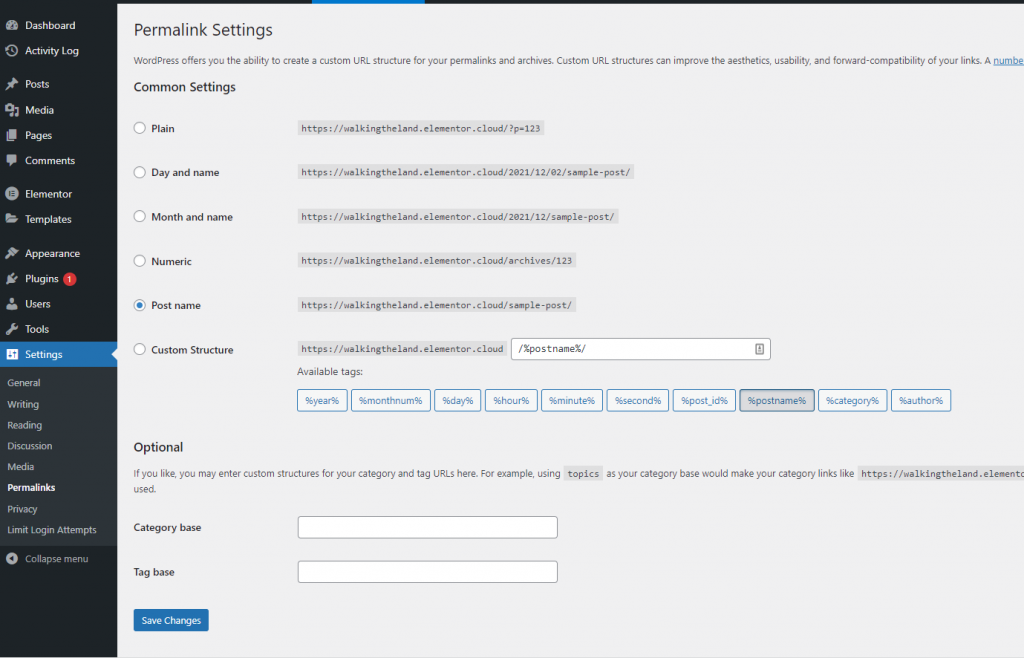
From the dashboard, go to Settings > Permalinks and resave your permalinks.
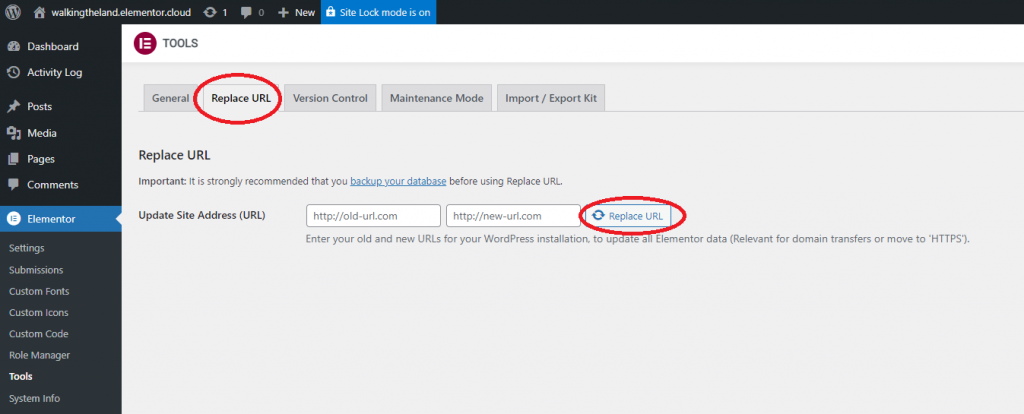
Next you’ll need to run the Elementor Replace URL tool to make sure users can find your new site:
Go to Elementor>Tools on the dashboard. Enter your old URL and your new URL in their respective fields and then click Replace URL.
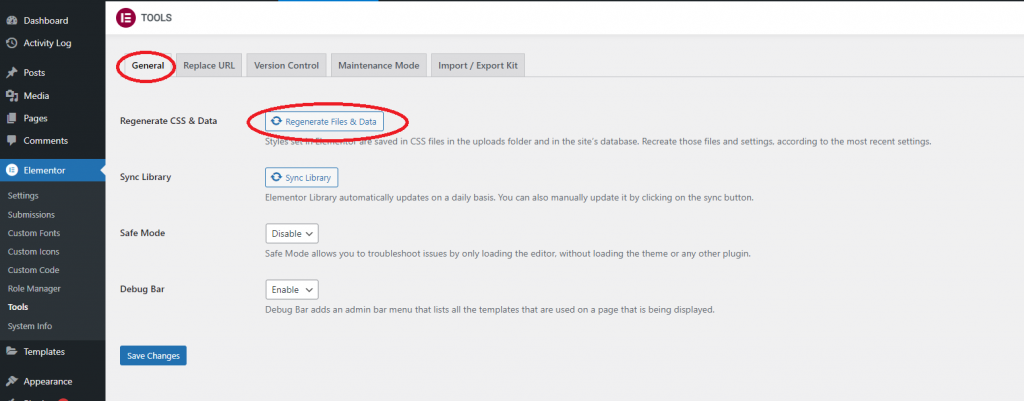
Now select the General tab and click Regenerate Files & Data.
After importing your content, we suggest going over the site again to check for any missing media or broken links.
Congratulations! Your site should be working properly – with all the content migrated.
Troubleshooting
If the Import/Export Kit tab does not appear
Some users may have to manually activate the Import/Export tool. Here’s how:
- Go to Elementor>Tools from the dashboard.
- If you don’t see Import/Export Kit in the tabs, select the Experiments tab.
- Use the dropdown to activate “Import Export Template Kit”.


The Import/Export Kit tab should now appear.