Have you ever visited a website only to be met by a 404 error?
If one of your WordPress website’s visitors tries to access a page that doesn’t exist on your site, they’ll see the same message, which can be frustrating for them if your 404 page isn’t optimized.
With Elementor Pro, you can fix that by creating a custom 404 page design that matches the rest of your website and helps your visitors get to the right spot.
In this post, we’ll talk a little bit about what your 404 page is and why it’s important. Then, we’ll show you some real-world examples and teach you how to build your own custom WordPress 404 page using Elementor.
When Does a 404 Page Display?
404 Not Found is an HTTP error that essentially says, “the web browser was able to connect to the website server, but it was unable to find the specific page that was requested.”
You, or your website’s visitors, will typically encounter a 404 Not Found error when trying to open a page that doesn’t exist. This could be because you or your visitors:
- Clicked a broken link
- Mistyped a URL
- Etc.
When your server sends a 404 Not Found response to visitors’ browsers, it also displays the 404 page.
The default 404 page is something bland and unhelpful like this:

However, most WordPress themes include their own 404 page templates that will display instead.
With Elementor Pro, though, you can create your own custom 404 page using Elementor’s visual, drag-and-drop builder (which you’ll learn how to do later in this post).
The benefits of using Elementor Pro over-relying on your theme’s default 404 page are that you can create a more user-friendly 404 page, add some of your own branding, and maybe even build a connection with some humor.
How to See 404 Errors on Your WordPress Site
If you’re using WordPress and Google Analytics, there’s an easy way to check how many 404 errors your visitors are encountering.
Open Google Analytics and go to Behavior → Site Content → All Pages. Then, change the Primary Dimension to Page Title and search for “page not found”:
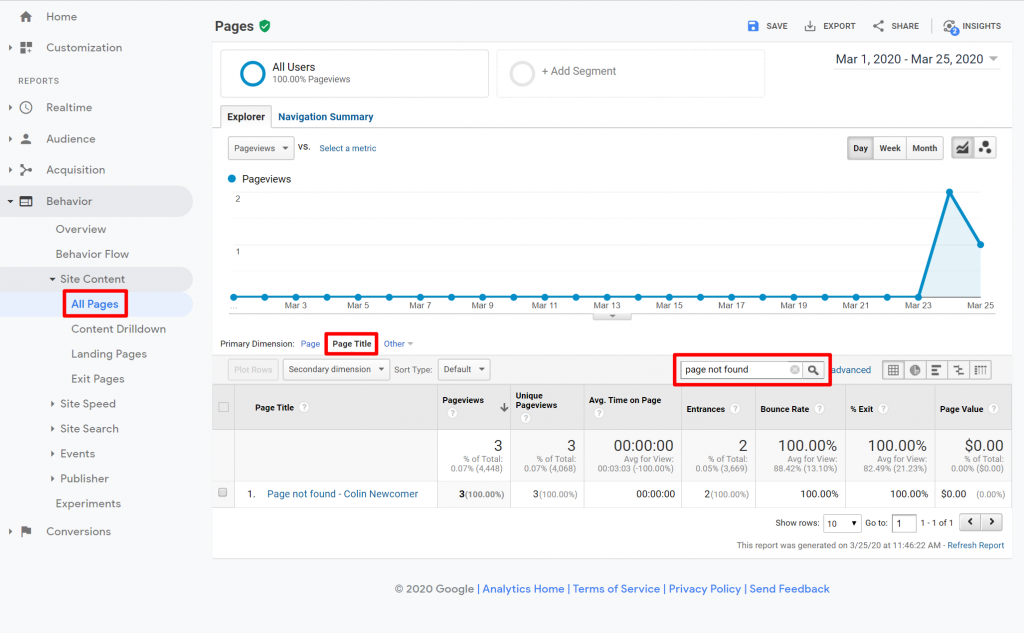
If you click on that result, you can see a list of the actual broken URLs that triggered the 404 errors.
Why You Should Care About Your WordPress 404 Page
No matter what you do, you’re almost certainly going to have at least some visitors who encounter a 404 page on your site.
These are people who are interested in what your site has to offer, but they can’t get what they want because they followed a bad link, mistyped a URL, etc.
There are two ways that this scenario can play out:
- Those visitors stay frustrated and leave your site.
- Your 404 page helps guide them to the right spot, and they get to enjoy your website, either by finding what they were looking for or discovering other content that they’re interested in.
What to Include On Your 404 Page
Now for the important question — how do you make sure that your 404 page falls into that second scenario? That is, how do you use your 404 page to guide visitors to the right spot?
Usually, you’ll want to include some or all of the following elements:
- An explanation of what went wrong and why a visitor isn’t seeing the content that they expected. Most people have no idea what a “404” means, so you want to use human-friendly language to explain why they’re not seeing the content that they expected.
- A search box to help visitors find the content that they were looking for.
- Links to your site’s most important content. Or, you can just make sure to keep your site’s standard navigation instead of hiding it like some websites do.
A lot of websites will go further and also try to incorporate some humor and branding into their 404 pages. This lets you turn a negative situation (a 404 error) into a way to reinforce your branding and maybe even market your product/services.
Let’s look at some examples.
Examples of Successful 404 Pages
If you want to see more examples, we have an entire post dedicated to the best 404 pages!
Elementor
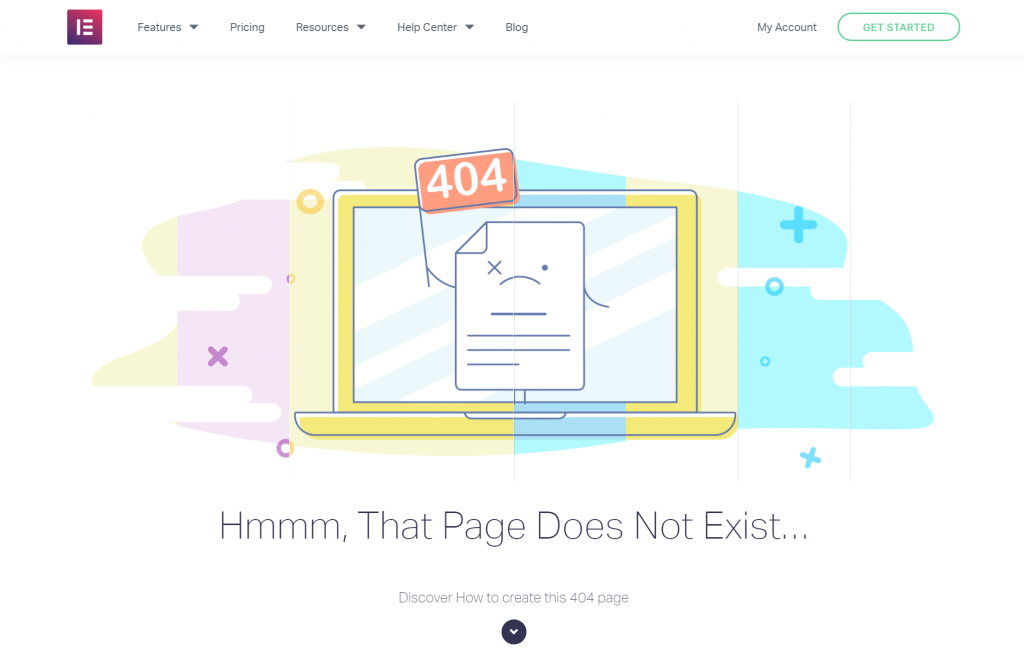
I’d be remiss if I didn’t include our own 404 page. The Elementor 404 page still includes the regular site navigation to help people move around. However, it also includes a playful animation as well as a CTA to teach people how to create their own custom 404 page with Elementor:
ModCloth
ModCloth is a popular clothing ecommerce store that uses its 404 page to redirect users to popular product categories. It also shares customer support channels if users are still frustrated and unable to find what they’re looking for:

WordPress.com
The 404 page for WordPress.com is simple, but it provides all the elements that I mentioned above:
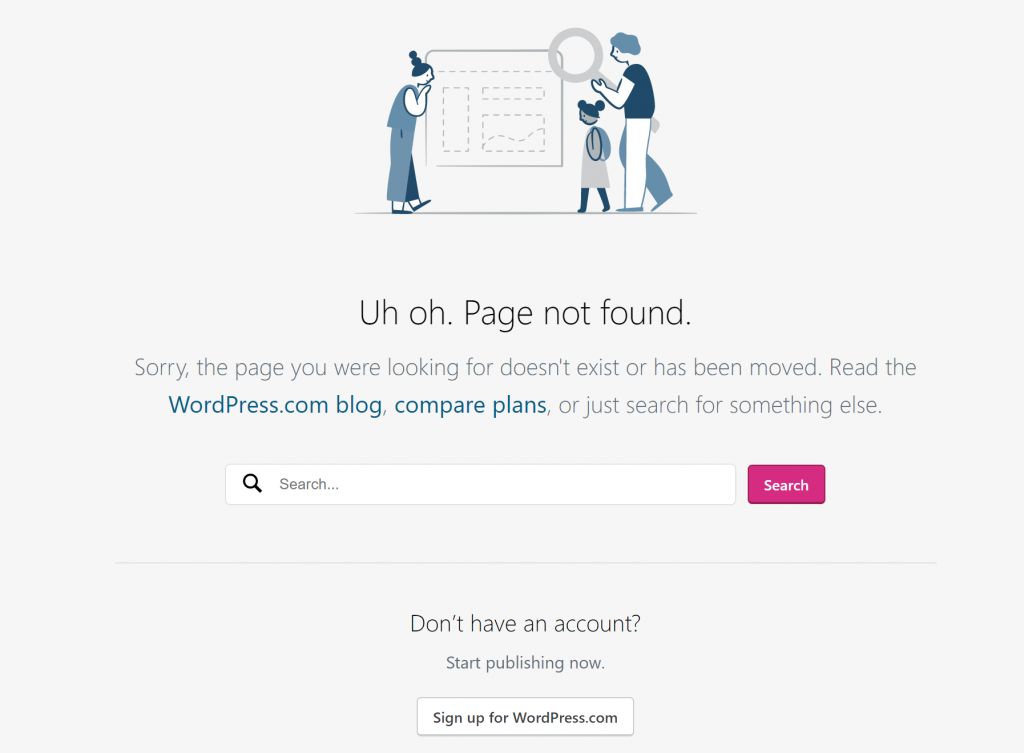
Again, check out our full 404 examples post for even more inspiration.
How to Create a 404 Page With Elementor
To create a 404 page with Elementor, you’ll need Elementor Pro so that you can access Theme Builder.
1. Create a New 404 Page Template
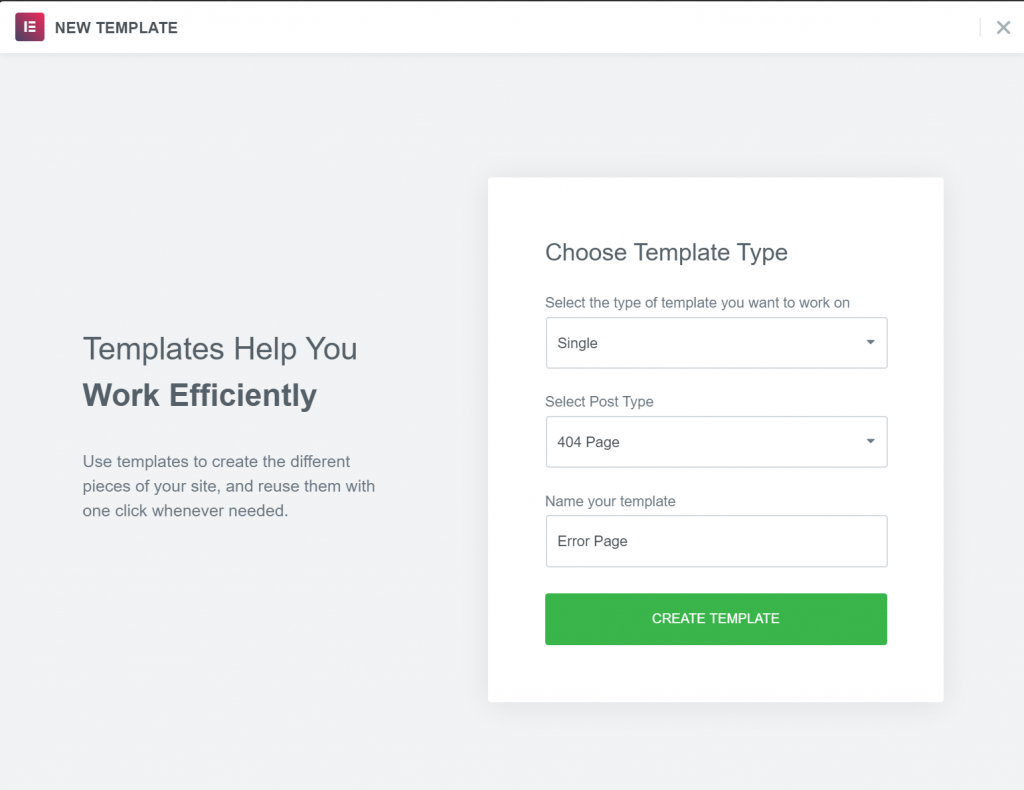
Once you have Elementor Pro installed, go to Templates → Theme Builder → Add New.
First, use the drop-down to select Single for the template type. Then, use the Select Post Type drop-down to select 404 Page.
You can also enter a name to help you remember your template. One note here, though – do not use “404” as the name for your template, as it causes issues with WordPress’ permalinks. You can name it something like “Error Page” instead.
Then, click Create Template:
2. Choose Pre-Made Template or Start From Scratch
From there, you’ll see a list of 404 page templates. The easiest way to get started is to just pick one of these templates and then customize it to your needs:
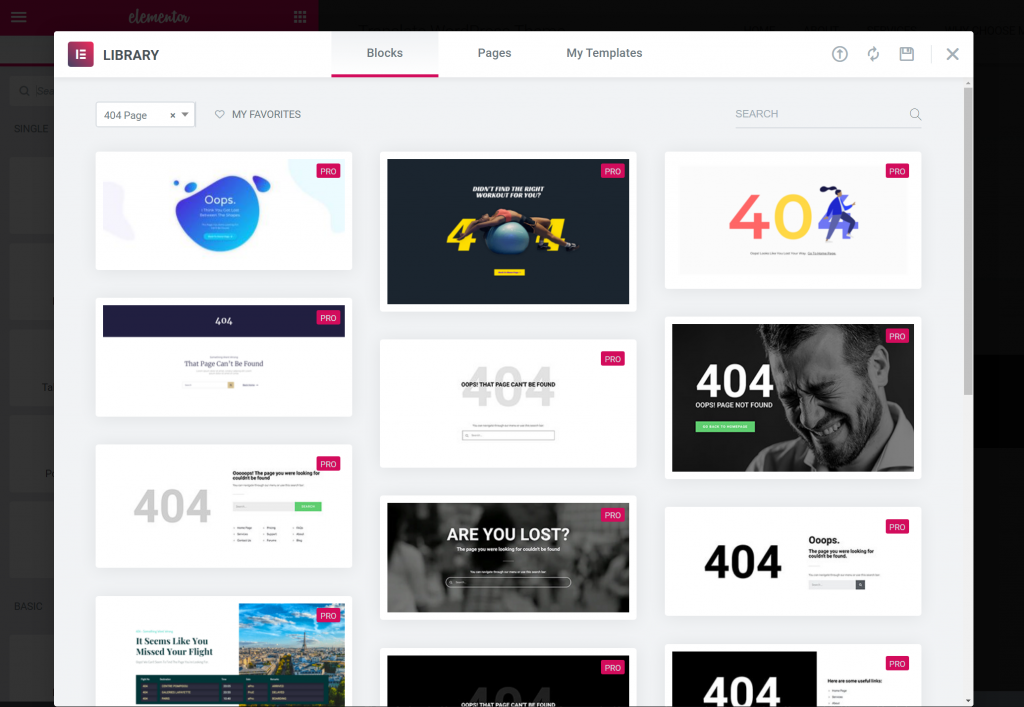
Or, you can just close the templates to build your own 404 page design from scratch.
3. Design and Customize Your 404 Page
No matter whether you start from one of the pre-made templates or build your design from scratch, you’ll be able to use the regular Elementor interface and all of the widgets to design your page.
For example, to add a search box to your 404 page, all you need to do is include the Search Form widget.
If you want to create something similar to the Elementor 404 page, you can use the Media Carousel widget, as we detailed in the video above.
Once you finish your design, click to Publish it. You should then see that Elementor automatically selects the Include rule to display this template on your 404 page. To finish things out, all you need to do is click Save & Close:
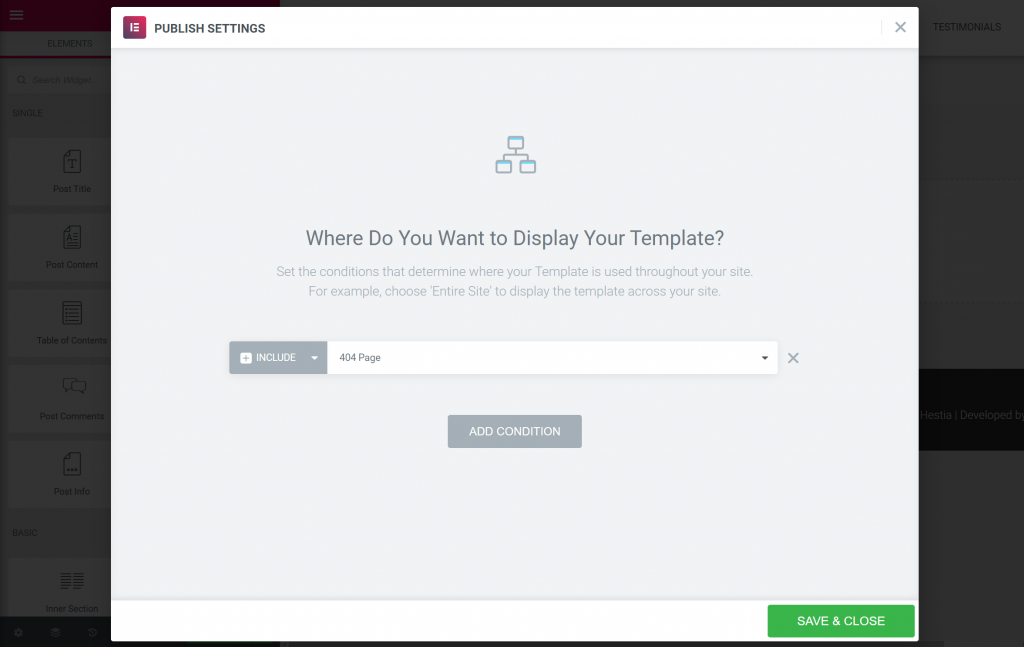
And that’s it! You just created your own custom WordPress 404 page using Elementor.
Create Your Own Custom WordPress 404 Page Today
Creating a custom WordPress 404 page is an important, but often overlooked, part of designing a complete WordPress website.
No matter how much you try to prevent 404 errors, your visitors are invariably going to encounter them.
When that happens, you want to be there to greet them with a branded, useful page that helps them get to where they want to be.
With Elementor Pro, you can create your own custom 404 page template using the same Elementor interface that you rely on for the rest of your content.
Do you have any questions about how to create a custom 404 page with Elementor? Let us know in the comments section below.
Looking for fresh content?
By entering your email, you agree to receive Elementor emails, including marketing emails,
and agree to our Terms & Conditions and Privacy Policy.
