Introduction
Website kits allow you to build professional websites without needing to know how to code or even design. A kit gives you webpages, page features like pop-ups, and everything else you need to build a stunning website.
There are two ways you can build your website with a kit. For Elementor hosted website owners, you can start with a website kit when you first purchase your site. From here, you’ll be taken through the kit selection process.
If you’re a plugin user, or a hosted website user who didn’t originally install a kit, you can install kits by going to your WordPress dashboard and selecting one via the Kit Library within the Templates tab.
In this how-to guide, we’ll look at how you can find and implement a kit.
What is a website kit?
Website kits contain webpages, forms, pop-ups, and other features that you can use to create a website. Features are modular, enabling you to customize your website through visual editing. Every website kit comes with a complete design and structure for a full website. This ensures you won’t forget to add a necessary feature.
Finding a website kit
The Kit Library
Whether you’re an Elementor hosted website owner just starting out, or you want to incorporate a kit using the plugin, you’ll need to go to the Kit Library:
For new Elementor hosted website owners:
As part of the installation process, you’ll be given the option of starting with a website kit. The system will walk you through the kit selection process, helping you narrow down the choices according to the type of site you want to build and your experience level. Keep in mind that you can always change your mind later by restoring your site and choosing another kit or choosing to start from scratch.
For all others:
- Open the Kit Library by navigating to the WordPress Panel.
- Click Templates.
- Open Kit Library.
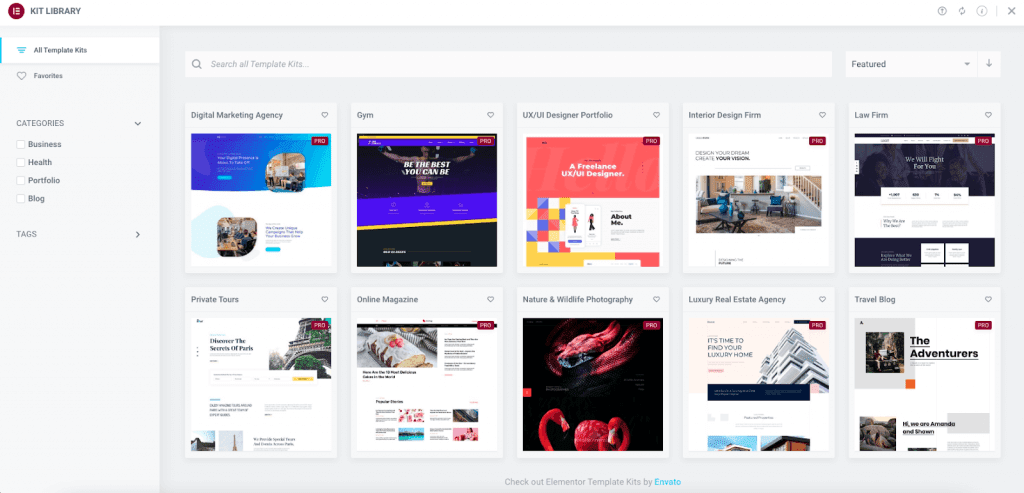
Once in the Kit Library you have several ways to look for your perfect kit:
- Scroll through the entire library
- Search for a specific term (e.g. Bakery)
- Use the dropdown menu to order the library by Featured, New, Popular, and Trending
- Search through the kits by category, tags, types or plan (Free, Pro or Expert)
Remember that after you apply a kit, you’ll be able to customize the content. If a specific genre isn’t available, use a similar kit and make it your own!
Important: It is highly recommended that kits be installed on a clean WordPress website – one that does not have any other kits, headers, footers, etc. installed, as these may conflict with your website kit. In addition, kits may overwrite or append your current site data. Hosted website users can check out “How do I delete my Elementor hosted website to start over again?” for information on how to start with a clean website. All users can export their sites using the Export Kit.
Viewing the kits
When you find a kit that interests you, hover over it and click View Demo. You can then look at the kit’s pages, even seeing them as they would appear on a desktop, tablet, and mobile device.

Use the Overview button to see all the pages and site parts (e.g. header, footer, page and templates, archives, 404 page) you’ll be importing.

If all looks good, you’ll want to apply the kit to your site.
Applying the website kit
Once you’ve found your dream kit, it’s time to apply it to your site:
- Click the Apply Kit button – Elementor may ask you to enable the importation of SVGs before applying the kit – you should allow it.
- You’ll be asked whether you want to apply the whole kit or customize the parts you want to import. Unless you’re an experienced Elementor user, we recommend applying the whole kit.
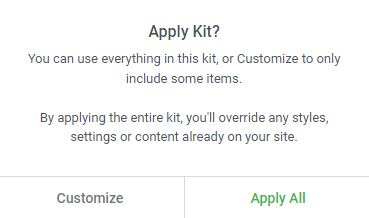
Unless you’re an experienced user, we recommend selecting “Apply All.” - Wait for the importer to complete; don’t close this screen until it’s finished!
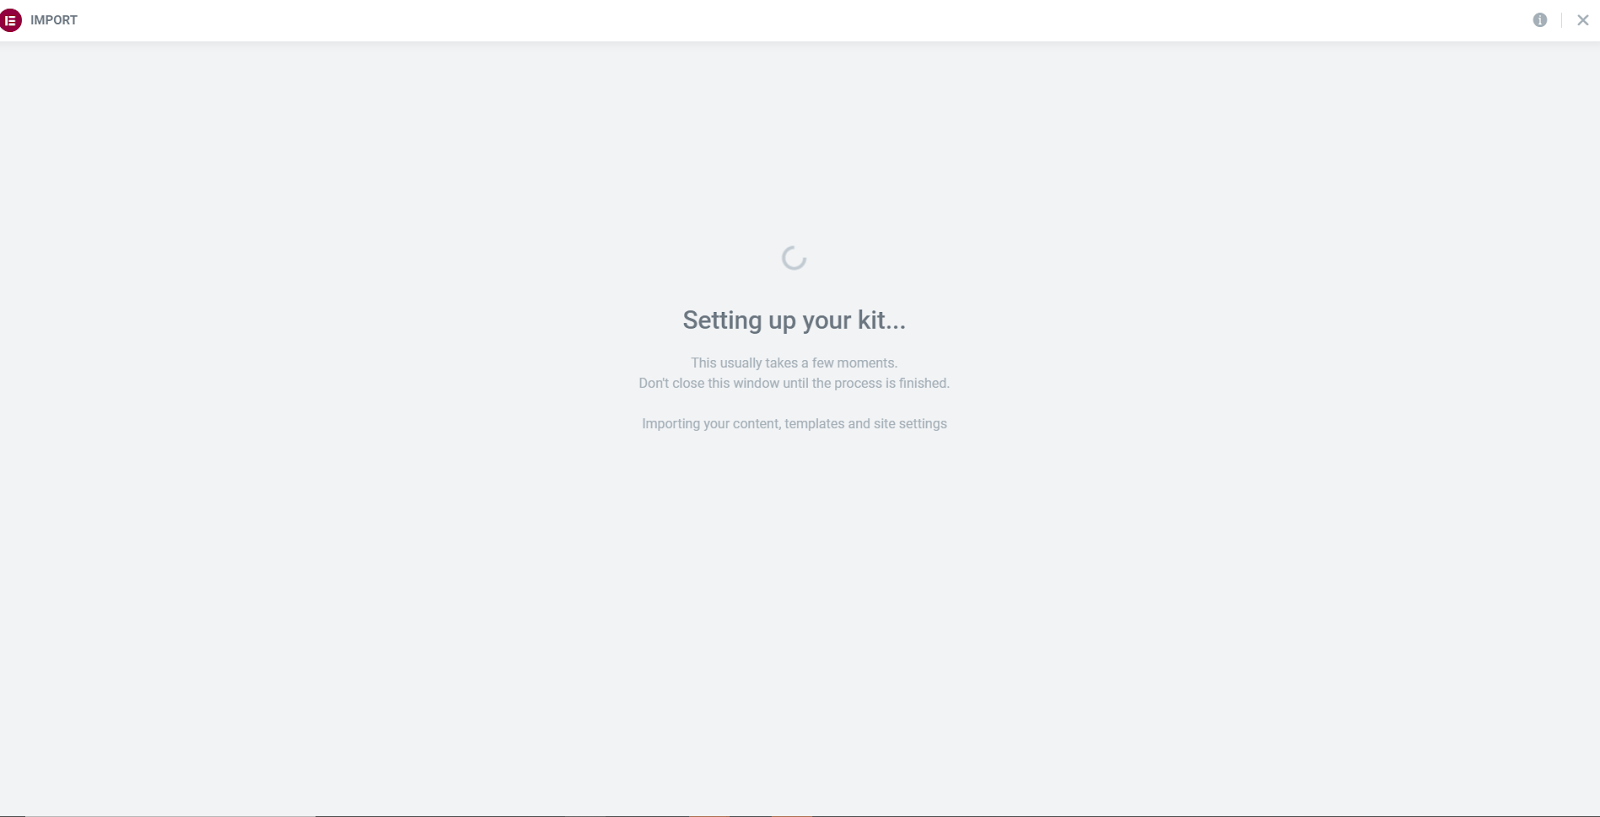
Wait until the import completes its magic! - Click Next. You’ll then see a list of items that were imported successfully.
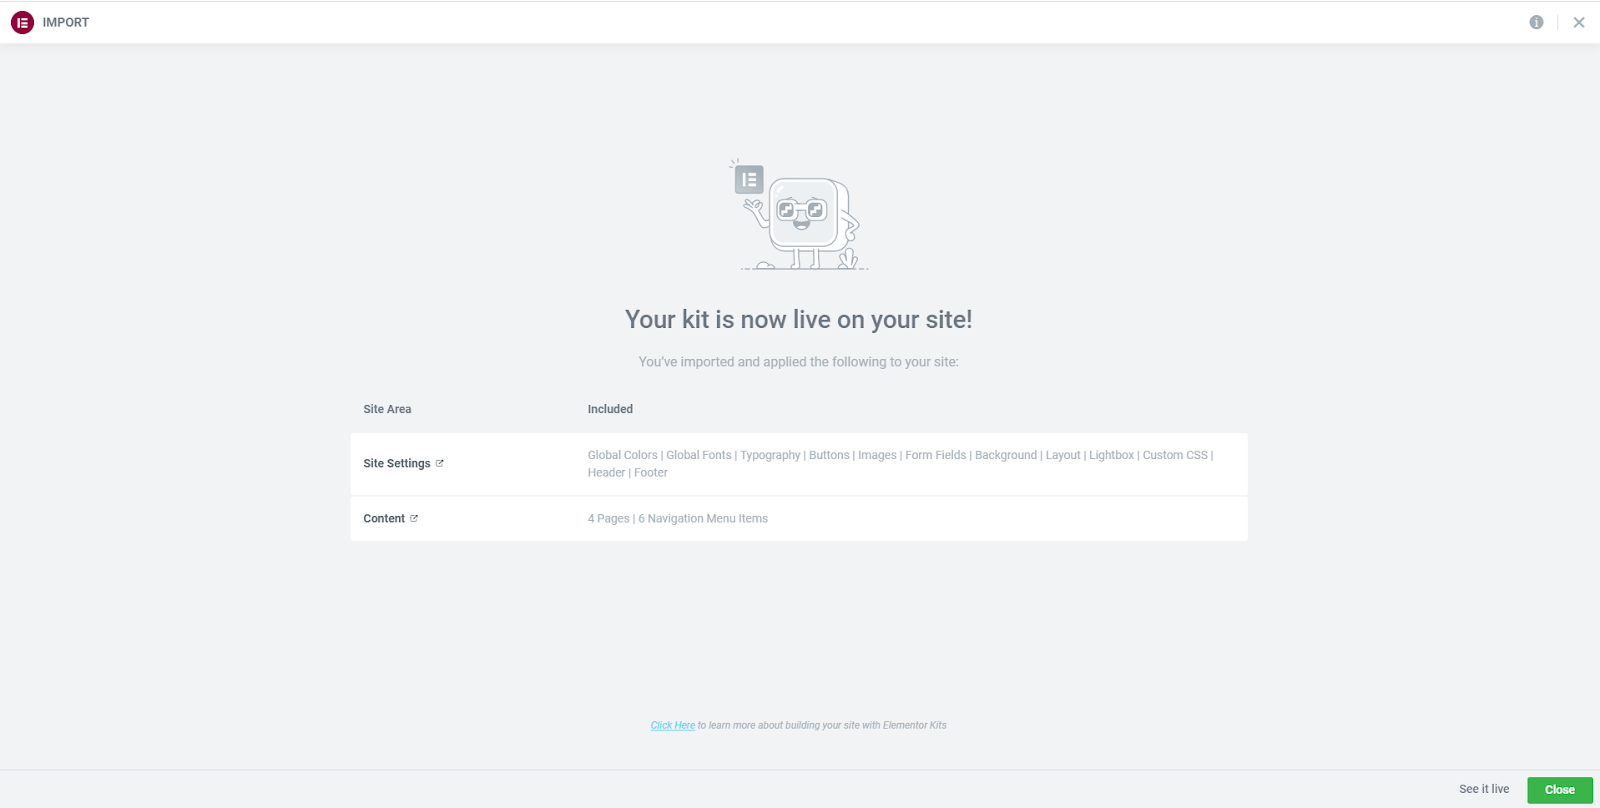
Sucess! - Click Close to complete the process and exit the import wizard.
- Once back at the WordPress dashboard, click the Pages tab to view your new pages and begin customizing them.
The bottom line
Adding a website kit will allow you to get your site up and running fast. Kits provide you with powerful website features placed on a webpage designed by some of the best in the business. Website kits also provide you with an example website using the powerful features available in Elementor. This shows you what your site could be. Finally, website kits help you avoid overlooking features your site visitors will need.
Next steps
After installing your kit, you’ll need to customize it for your own needs. Check out our article on customizing your kit’s site identity and menu.
To get the most out of Elementor, check out the Elementor Academy and our YouTube channel for helpful learning resources. If you come across any issues or need help, please contact our Support Center.