WordPress makes it easy to build a website and get it off the ground quickly. WooCommerce transforms any WordPress website into a fully functional online shop. However, if you stick with their default options and features, then you run the risk of creating a copycat site that might not fit your business needs. It’s vital to find optimal tools to design and customize your site until it’s just right.
Fortunately, there are thousands of WordPress and WooCommerce plugins to add extra features to your store – Elementor itself is the easiest way to customize your WooCommerce product page. However, it’s also one of its most major flaws because when you combine WordPress plugins from different developers, there’s often a risk of compatibility errors and other issues.
Fortunately, this is not the case with WooCommerce Product Table and Elementor. Both of these plugins give you a higher level of control over your site’s look and functionality – and they can be used together to achieve even better effects.
In this post, we’re going to introduce both plugins and explain how they’re related. Then we’ll show you a few examples of how you can use them together on your WordPress site. Let’s take a look!
A Brief Introduction to Woocommerce Product Table and Elementor
As we mentioned above, there’s a huge choice of WordPress plugins that can help you design a better WordPress site that is tailored to your needs. Some plugins are large-scale in nature, while others focus on adding a specific element or feature.
Elementor is an example of the former category:

Our page builder plugin provides you with an entirely new interface for designing web pages and creating content. By choosing from and customizing a vast library of widgets, blocks, and layouts, you get a lot more control over the way your site comes together.
WooCommerce Product Table, on the other hand, is a more targeted solution:
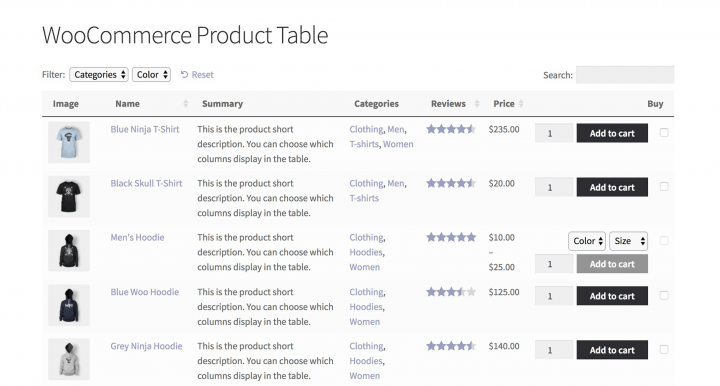
This plugin helps you add dynamic, customizable tables listing your WooCommerce products. These tables can be used for a variety of applications, but the integration with WooCommerce makes them perfect for displaying products and services in a user-friendly and attractive way. (If you want to display something other than products – such as posts, pages or documents – then you can use its sister plugin, Posts Table Pro. Posts Table Pro integrates equally well with Elementor, and lists any WordPress content type in a table instead of just WooCommerce products).
Elementor and WooCommerce Product Table work smoothly together and provide very different functionality. In combination, you can use them to achieve some highly beneficial effects that will increase your WooCommerce store’s sales.
Woocommerce Product Table and Elementor: A Case Study
In a moment, we’ll show you how to start using WooCommerce Product Table and Elementor together on your own site. But first, let’s take a look at a real-world example of what you can accomplish via this integration.
The website in question is a simple food ordering site for a vegetarian Indian cuisine business called OrderAmysFood.com:

This site enables visitors to choose from a number of options, place their orders, and schedule a delivery or pickup. It contains a traditional static menu where you can browse all the available options. However, it also features a dynamic ordering system, built using WooCommerce Product Table and Elementor:
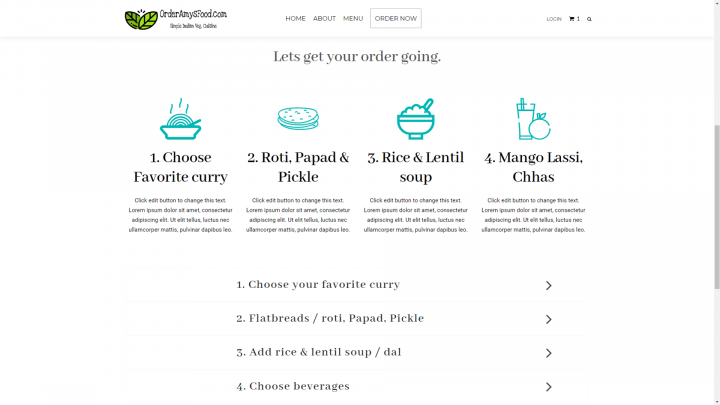
This page contains four expandable ‘accordion’ tabs, courtesy of Elementor. When expanded, each of these tabs displays an order form designed using WooCommerce Product Table:
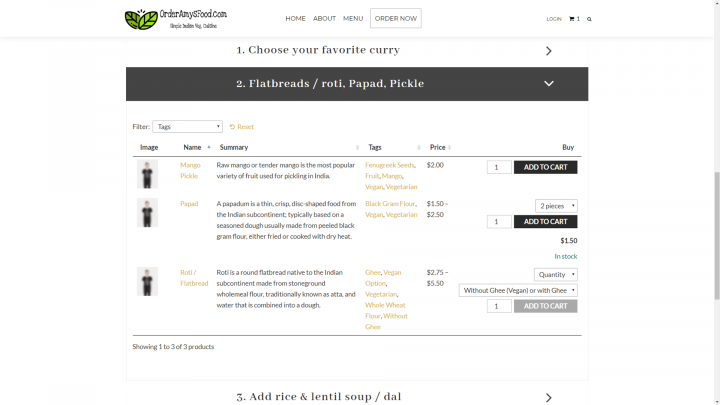
In these tables, you can find pertinent details on each menu item, including a description and price for each. You can also choose a quantity, select product variations options such as size and spiciness, and add whatever you like to your cart before checking out.
The designer behind this website tried a number of different plugin combinations, before settling on this one as the most effective. The Elementor accordion feature keeps everything well organized and user-friendly, while WooCommerce Product Table powers the dynamic and user-friendly ordering system.
How to Use Woocommerce Product Table Alongside the Elementor Page Builder (2 Examples)
Now, it’s time to get practical. In the next few sections, we’re going to look at some examples of how you can use WooCommerce Product Table and Elementor to achieve effects like the one featured above.
The sky’s the limit when it comes to using these two plugins together – these are only a few of the options. With a bit of experimentation, you can put together all sorts of pages using the same basic process we’ll demonstrate.
First, of course, you’ll need to ensure that both plugins are set up on your site. Fortunately, installing Elementor and setting up WooCommerce Product Table is quick and painless. You’ll also need to have WooCommerce itself installed and activated. Then, you’re ready to get down to work.
1. Add Woocommerce Product Table to a Text Editor or Shortcode Widget
Let’s start off with the most basic and useful application. If you simply want to use a dynamic product table on your Elementor website, you can add it to a widget so that it will display on the front end.
To do that, open up any page or post, and make sure you’re using the Elementor editor. If you see the traditional WordPress interface, hit the Edit with Elementor button to switch over:
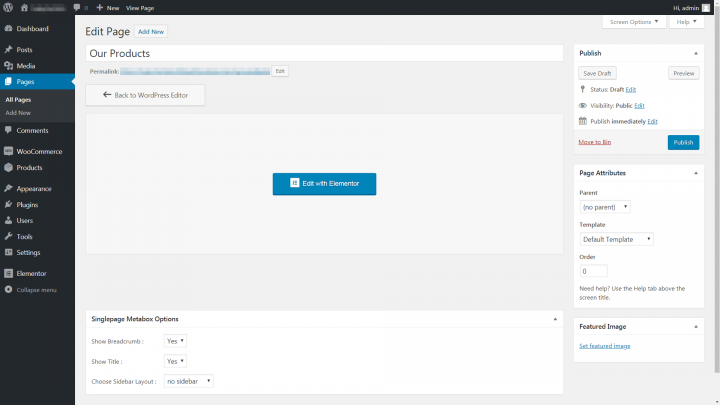
In case this is your first time using Elementor, let’s take a quick look around. On the right, you’ll see a large space where your content will display, updated in real time as you add and edit it. On the left, there’s a list of ‘widgets’ you can drag into that area, and then rearrange and customize as you see fit:
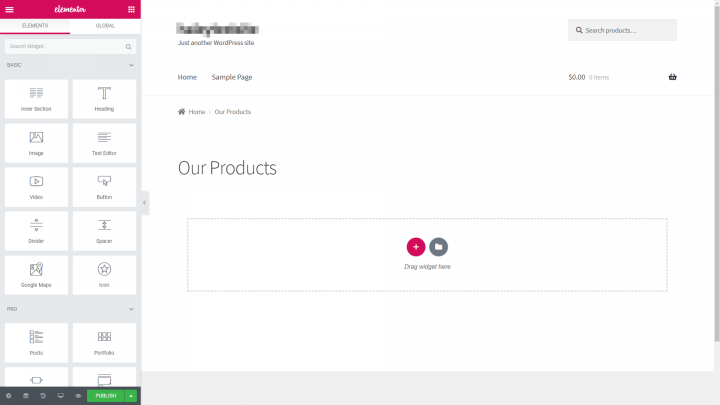
You can add a product table to many different Elementor widgets. If you just want to display a single product table on a page, however, you can do so using a basic text section. As such, grab the Text Editor widget and drag it over to an empty space:
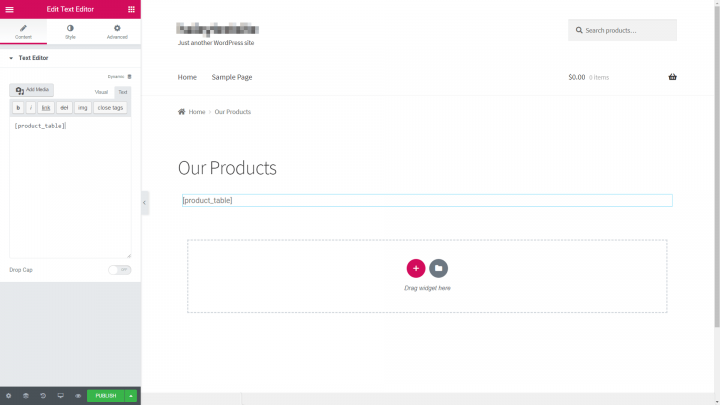
You can then click inside the widget to delete the default text and enter whatever content you like. As for the product table itself, add that by pasting in this simple shortcode:
[product_table]
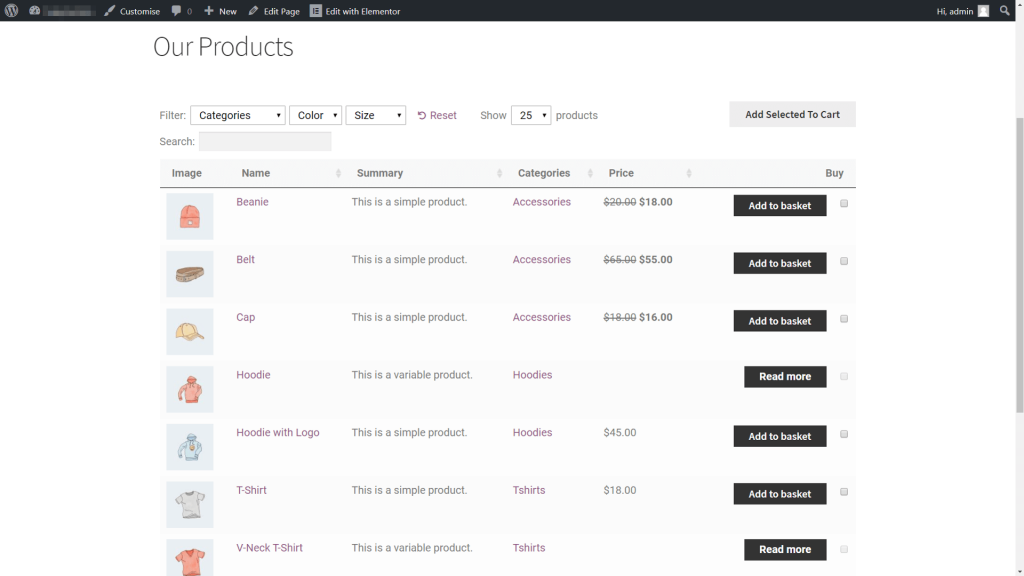
Wherever you place the shortcode within the page is where the table will appear, which you can verify by checking it out on the front end:
If you’d like to use an element just for the code itself, you can also use the Shortcode widget:
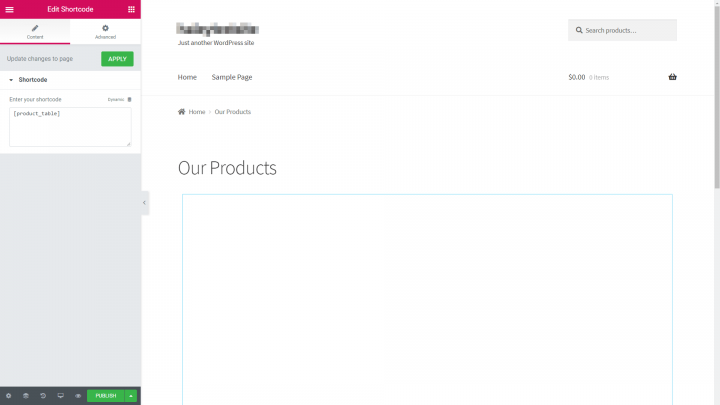
No matter where you decide to place the table, don’t forget to save the page when it’s in place. After that, you’ll probably want to customize the way the table looks and works.
To do that, return to your WordPress dashboard and head to the WooCommerce > Settings tab. Click on Products at the top of the screen, and then Product tables:
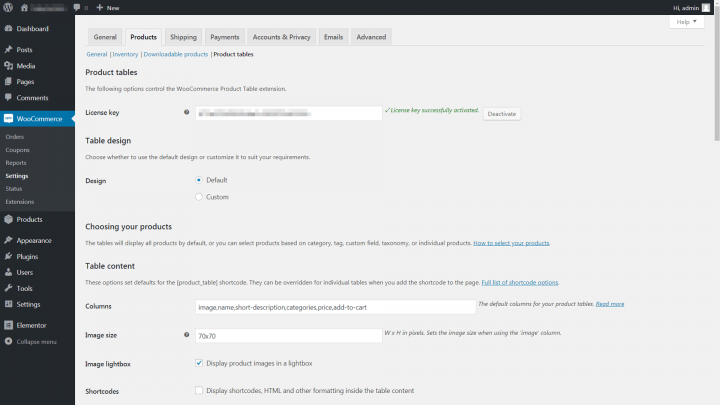
Here, you’ll find a comprehensive list of settings for your WooCommerce product table. You can choose what information will appear in the table, add filters and variables to it, and a lot more. For more details on the various options, you can check out the plugin’s documentation.
Any changes you make here will be automatically applied to the product table you just placed using Elementor. Once done tweaking the table to suit your needs, save the settings, and you’re good to go!
2. Organize Multiple Product Tables Using Accordions, Tabs, or Toggles
The above method works well if you want to display a single table with all of your WooCommerce products. However, what if you’re looking to create multiple tables, each containing a separate category of items?
There are various ways you can do this in Elementor. For instance, you can use the Accordion widget to create the same effect we saw in the earlier case study.
To get started, drag the Accordion widget over to the right-hand editing area:
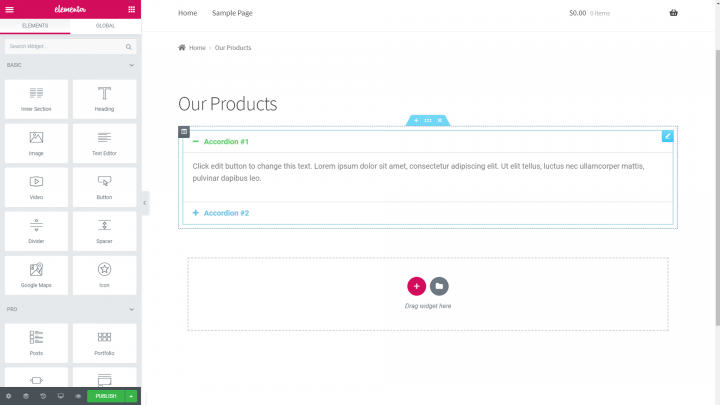
You can use the plus signs to add as many different tabs as you’d like, and edit the headings and text within each one. You can also add a product table to one or more tabs, using the same shortcode as before.
Of course, merely adding the base shortcode will create a series of identical product tables, which probably isn’t what you want. Instead, you’ll need to modify each shortcode to display only certain products – for example, items within a specific category.
How you do this will depend on what products you’d like to include and/or exclude in each table. For more details, you can check out the full guide to modifying your WooCommerce Product Table shortcodes.
It’s worth noting that you can achieve a similar effect using some other handy Elementor widgets. This includes the Toggle widget and the Tabs widget. When it comes to displaying multiple WooCommerce product tables in an attractive and organized fashion, Elementor has your back.
The online HTML, CSS and JavaScript organizers will take care of your dirty markup!
Conclusion
If you want your e-commerce store to really stand out, you’ll need to put some serious thought into its design. For example, you’ll want to find the best method for displaying your products, ideally in a way that’s both user-friendly and nice to look at.
Fortunately, this is easily achievable by using the WooCommerce Product Table plugin in conjunction with Elementor. By adding your product table shortcode to specific types of widgets, you can show off everything your site has to offer (or just a selection) in a way that’s truly dynamic.
Do you have any questions about how to display your WooCommerce product tables using Elementor? Ask away in the comments section below!
Looking for fresh content?
By entering your email, you agree to receive Elementor emails, including marketing emails,
and agree to our Terms & Conditions and Privacy Policy.
